
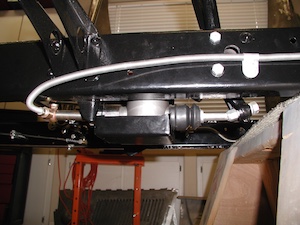
The master cylinder is the “heart’ of a safe and functional brake system. It is also a common item that requires routine servicing and sometimes even a rebuild. After 70 years, the elements have taken their toll and suddenly you find the MC body leaks or the brake pedal jams. The following information will help make a major repair a minor event.
Removal begins with draining of the reservoir. Remove the 2-way end fitting and pump the pedal. This is required to allow the internal piston to fully depress and provide clearance of the pushrod when unscrewed from the brake pedal. Also, remove the nut from the MC extension to give a little more wiggle room to remove the pushrod. Use a 1 1/8 US wrench for the nut.

There may be occasions where you still may not be able to get the pushrod out. If so, you will have to remove the pedal shaft to remove the brake pedal. Remember to do so; you have a cotter pin on each end of the shaft next to the flat washer. Then the pedal shaft can be driven out through the hole in the chassis frame.
Disassemble the MC and inspect all parts for serviceability. As a minimum, you will need a rebuild kit (rubber parts) and new copper washer. The internal bore of the MC is critical in that it should not have any pitting. Simple honing is often enough to clean and polish. If not, replace the MC body, particularly if the can is rusty. Before assembly do a “drop test”. This is where you drop the piston into the cylinder. It should drop freely though with no binding or lodging. If it stops in the cylinder, further hone or polish the piston edges.

When complete, gather all of the parts and lay them out in proper order. Then, using brake fluid as a lubricant, assemble as follows:
1. Screw the nut onto the extension and then tighten the nut in a vice with the extension vertical. This will hold the MC and allow you to freely use 2 hands. Also consider using a long nut for the extension, it is much easier to remove or install on the car.


2. Place the flat copper washer in the top of the extension. Then screw the MC body onto the extension using your hands to torque tight. Just a strong grip and turn of the hands should be adequate.


3. Load the remainder of the parts similar to loading a musket. The first item is the rubber washer. It should lay flat in the bottom of the barrel.
4. Push the rubber valve into the valve body (looks like a top hat) and make sure it is fully seated. Then the rim (“brim”) of the top hat should lie onto the flat rubber washer.
5. Next load the spring which fits around the top hat and rests on the rim. Then the rubber cupped washer fits on top of the spring.
6. The piston is next. However, first install the rubber seal on the pushrod end of piston. Then use a screwdriver to hold pressure on the piston while folding the edges of the piston seal into the cylinder.
7. The last item is the circlip. Continue compressing the piston into the cylinder with the screwdriver and then insert the circlip retainer.

The final test is compressing the piston by hand using a screwdriver to make sure it moves full travel and releases to static position. If all is well then reinstall the master cylinder and “take a brake” (pun intended).
Doug Pelton
www.FromTheFrameUp.com

I found this a really helpful little article. I like the fact that Doug Pelton is happy to share his knowledge and expertise with the rest of us.
Doug Pelton has a video on his site, but misses a couple of tips.
1. Polish both sides of the big copper washer with 400 grit Emery paper on a flat surface to get a good seal.
2. Use thread sealer on the tail piece.
3. The metal plate on the back end of the spring is a non return valve for bleeding. Make sure it is flat and polish it with the Emery paper on a flat surface.
4. A bonded washer at the back and a paper seal at the front of the Banjo union make a perfect seal. I was not successful with the copper washers. The bonded washer is known as a Dowty seal. It is a steel washer with a bonded rubber insert.