Welcome to the first issue of 2020 – February, number 58.
I have sold my TC (or rather, Steve Baker has sold it
for me). Widely known as ‘The Vicar’s car’ I had to come to terms with the
realisation that I had too much on my plate with a J2 that is still not finished
and a TF1500, which still needs work. However, I’m sure that the new owner, who
is known to me, will ‘do the honours’ and get her back on the road.
Talking of TCs, I’d like to introduce you to the ‘4tees’ who are pictured below as a
group, with their TCs starring in a separate photo alongside. These four
gentlemen bring their TCs and meet up regularly for a pub lunch.
From
left to right, David Irwin, Mike Lugg, Eric Worpe and Mike Card. The following
is by way of introduction from each of them.
David Irwin: “I bought my TC in Los Angeles as
a millennium gift to myself in late 1999. Had it shipped over, arriving
port of London in April 2000. Two years of work and then MOT in April 2002.
Been
a steady runner and regular attendee to our ‘4tees’ pub lunches.”
Mike Lugg: “I bought my TC in August 1959
when I started my graduate training, building steelworks in Scunthorpe. The car
was a wreck, as they all were in those days, but it served me well regularly
covering the 220 miles from Scunthorpe to the Isle of Wight where my girlfriend
lived. The car remained in regular daily use until I got a company car in 1964.
Completely rebuilt by me in the late 70s/early 80s back on
the road in 1986 for the London-Inverness run featured in Motor magazine. Henry
Stone the ex-MG racing mechanic rode with me one day and christened me “Le pilot
fou”! Since then used regularly on MG runs, weekends and short
breaks both here and on the continent.”
Eric Worpe: “BRJ 999 was bought in 1964 and I
soon discovered that I’d been sold a ‘pig in a poke’ by a Mr Fowler; I missed
the clue. Actually, it’s been a mixed blessing as it has allowed me to gain
(too) much knowledge during two rebuilds. I’ve reversed some of the demands of
the “bean counters” at Abingdon by strengthening most of the weak
areas and fitting higher brake/side lights, which I feel is less of a
“violation” than being shunted.”
Mike Card: “I bought SRF 435 as a bare chassis frame in
1998. Built it as a supercharged “Café Racer”. Put it on the road in May 2007.”
The
cars from left to right:
SRF 435 (TC9477) – Mike Card; LPD
626 (TC2490) – Mike
Lugg; DAS 719 (TC6132) – David Irwin; BRJ 999 (TC 0367) – Eric Worpe.
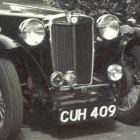
Front
cover:
‘Ruby’
(KKA 362) First Registered 2.2.1949 in Liverpool
*TC 7635 XPAG 8386 matching numbers
*No. of former keepers 5
*Owned since 6.6.2013, bought in running order and run until December 2018
*Engine/gearbox
rebuilt in 2019 by George Edney to 1350cc fast road spec
*Body etc “refreshed” in 2018 –
just back on road
‘The
Beast’ Jaguar E-Type (known as an XKE in US) 3.8 litre Series 1 OTS matching numbers
*First
Registered 11.10.62 by Henley’s, Park Lane, London to owner at 59,
Knightsbridge, London
Picture the scene…there are just two
weeks left to go until the MG Octagon Car Club ‘Founders Weekend’. The pet
sitter has been booked, hotel deposits paid and I’m working in the garage as I
have been for the previous three weekends and also every night after work until
at least 10pm. My wife has been making bacon cobs, cups of coffee and meals to
keep me going and clearing up after me so I can stay in the garage. It’s
reached the point where it is no fun anymore and comments of “I’m not
having any more holidays in old cars” whilst delivering cups of hot
steaming coffee have been heard resounding around both the garage and the
house!
BACKGROUND TO THE GARAGE SCENE….
For the last few years of ownership I have noticed that the TA has been exchanging oil and water. In an effort to come up with a solution I bought an engine from a seller in France. This caused my wife Mel much amusement as she listened to the phone calls being made and the use of my best “allo, allo” accent whilst speaking all the time in English (to my mind I was speaking French!) Despite my lack of French speaking ability, the deal was somehow done.
My original plan was to make a rig to run
the French engine out of the car and, when proven and fully sorted, the plan
was to then install it in the car. In the event, when my car was put away for winter,
I decided not to waste time manufacturing a rig to bench test the engine, but
to cut corners, save time, and simply install it in my car with a belief that
all would be fine; if it wasn’t I could easily change it back! Around this time,
I also removed the radiator shell for chroming and was advised it would be at
least March before I could collect it.
Note: when I bought the car there was a
“pimple” and a small patch of chrome missing on the top right-hand
side of the shell……strange, but explained later in the story!
As I couldn’t get the car running until
the radiator shell arrived back, I thought I could occupy myself with other
things…
February soon arrived and with it the
stark realisation that there was not actually much time left until the start of
the new car season. I installed the replacement engine and gearbox with little
trouble and was then waiting for the re- chromed radiator shell to arrive. The shell
was returned at
the beginning of March and time was now fast running out. I got the car started
but it was running rather rough. I managed to drive it around the corner to my
long-suffering friend and “go to man” Mike for help. Mike set the
timing and tuned the carburettor and before long he had it “running
sweet”. I went for the first test drive back around the village and as
soon as I met the first hill……….clutch slip!
I had no option but to get to the clutch, either using plan A – engine and gearbox back out, or plan B – remove the floor and bring the gearbox out the back. I selected plan B and with a little wiggling the gearbox and bell housing came out and I was able to see the clutch. Nothing looked obviously wrong but I did notice it was a modern Kevlar clutch, rather than the cork one as originally fitted.
The TA clutch plate with the Kevlar
lining is shown on the left with the plate with the cork lining (as originally
supplied) shown on the right. Acknowledgement to Bill Davis in the US for these
pictures, which are on his useful and informative websites on the TA. If you
‘google’ Bill Davis TA you will find the sites. The Kevlar pic was sent to Bill
by Tony Slattery in Australia.
I read up in “Blower” – oil
fed cork clutch ….”oil, “oil, ……..there was no oil!!!! So how
could the oil get to the clutch? It seemed it should come from the end
crankshaft journal and down a drilling in the crank but, there was definitely
no oil coming down the crank. I then worried about whether oil was getting to
the journal. On a spare crank I retraced the oil feed but it wasn’t clear to me
how the oil got from the journal down the crank drilling.
Still not keen to remove the engine I
decided to drop the sump and remove the main bearing cap. I located the oil
hole in the crank and was able to blow air down it which came out the end of
the crank, it clearly wasn’t blocked but that didn’t explain why there was no
oil?
Help was needed, I admitted defeat and rang
Brian Rainbow; there is nothing Brian doesn’t know about MG TAs. What happened
next was quite comical and you have to
close your eyes and once again picture the scene….I was in my garage on the
phone to Brian with various bits of engine in my hands while at the other end
of the phone Brian was in his garage with various bits of engine in his hands,
trying to understand how oil could get through to the crank. After a lengthy
discussion with Brian I followed his suggestion to make a ” groove”
across the main bearing cap to aid the flow of oil to the hole in the crank. I
rebuilt the engine again and ran it up in the car …….success! Oil was now
coming down the crank to the clutch……I couldn’t thank Brian enough…at last
I felt I was getting somewhere, although how it should actually work, I’m still
not fully clear on …. any answers gratefully received.
BACK IN
THE GARAGE ……
I rebuilt
the clutch and gearbox and re- assembled the car once again. I gave it a test
drive and managed to ascend test inclines without any problems (or as well as
can be expected in a TA!).
We were
now ready to go to Oxford for the ‘Founders Weekend’ with 2 days to spare when
only 48 hrs earlier it looked like we were going in the modern car.
As I was
washing the car and getting it pristine for the weekend ahead, I noticed to my
horror that my nice newly chromed radiator shell had a pimple and the chrome
was lifted just as it was before I sent it for re-chroming …. Aghhhhh….
I believe
that when I re- aligned the engine and gearbox, I jacked up the engine and
during all my “wiggling” to align things the radiator top tank pushed
up into the chrome shell! I won’t repeat what I muttered (I had a Basil Fawlty
moment) but be forewarned!
NB: I now remove the top hose before jacking the
engine!
FOUNDERS
WEEKEND – OXFORD:
Despite
all the trials leading up to the ‘Founders Weekend’, including navigating the
Oxford ring road, we had a great time with the Octagon Club and it was
fantastic to catch up with everyone. The “icing on the cake”, having
actually made it to the weekend, was to get presented with the Founders
Cup….what an honour and completely unexpected!
We had a
good drive home until I thought that I could hear a noise; I managed to keep it
from Mel for a while but once she had heard it too, something had to be
done…and only 2 weeks left until our next event at Beamish…..here we go
again I thought. I consulted Mike and, with his stethoscope at the ready, we
prodded and poked around; something clearly didn’t sound correct but what? The
engine was running well enough but, – and I hated to state this – it
sounded like it was coming from the clutch area. As I had recently been working
on the clutch, I feared I had done something wrong.
Out came the floor and the gearbox
again. The clutch appeared “ok” but without the gearbox on, it still
made a noise….it was at this point that I began to have nightmares. Maybe the
groove I’d made in the bearing cap had caused the white metal to break up and
the bearing was now no good? Maybe the fact I had achieved good oil flow to the
clutch with the groove I’d made in the bearing cap was taking all the oil that
fed the number 3 big end bearing?
I took the sump off again to check the
big end journal, all looked in order. The main bearing looked fine too, I
rebuilt it all and ran the engine in the car again – the noise was still there!
As I listened, I convinced myself that the noise was coming from the back of
the engine. As I looked closely, something caught my eye…the back of the
engine had a small bright patch; the starter ring had moved forward on the
flywheel and was rubbing on the back of the engine……found it!!!! Who would
have thought of that? I removed the flywheel from the engine that had originally
been in the car and fitted that; soon the car was once again back together.
My good mate Mike came around again to
help and, as he leaned across the car to check everything as I was turning the
engine over with the starting handle without any plugs in, he complained that
he had got wet!? It seemed that something had come out of number 3 cylinder. We
checked again and sure enough there was water coming out of No 3 cylinder……agh
!!!! What else could go wrong?
Undeterred, I changed the head gasket
and, after setting everything up, we were up and running again……with only a
couple of days to go to the Beamish event.
BEAMISH SAFETY AND RELIABILITY RUN:
Mel has previously written an article on
our annual Beamish trip (pic is from the 2019 event) so I won’t dwell on
it but, suffice to say if you ever want a challenge for you and your car,
Beamish is it!
Things were looking up again, 600 miles
under our belt without too much trouble. The car jumped out of 2nd gear a
couple of times whilst tackling steep ascents but I have trained Mel to hold it
in position for now … the gearbox will need to come out again at some time.
A TA AND A SPITFIRE:
The next event on our calendar was a
photo shoot with a Spitfire plane. In the light of all our recent history I was
starting to feel anxious that the car would be “ok” as I didn’t want
to let anyone down.
Derby Museum wanted to create artworks to celebrate local history and involvement in the war effort and had commissioned a professional photographer ‘Red Saunders’ to work on reproducing important historic scenes in what is called “The Hidden Project” ……. 3 historic and globally significant moments for the City were planned to be re-created by ‘Red ‘in a series of 3 photographic tableaux for the new Museum of Making. ‘Red’ wanted a period car to stand alongside the Spitfire to create the war time scene along with actors and Rolls Royce employees dressed up in period dress.
Our Deputy Managing Director at work is a keen classic car enthusiast and was initially contacted by the Museum and asked to provide his car, an MG TD; however, he recognised that this was too modern for the period and selflessly got in contact with us to see if we might be interested in taking the TA….of course we were….what an opportunity! We had an amazing day as invited guests of Rolls Royce at their private hangers situated at East Midlands Airport where they keep the Spitfire (a MK 19 reconnaissance plane) and also their business jet. After meeting everyone we were asked to park the car in front of the Spitfire in the hanger. Red started to take pictures and the scene continued to develop adding actors and props – a small folding table where they were playing cards etc until a full pre-scramble type scene was created. It all looked great with our little car very much in the middle of it all.
While all this was going on, I had the
freedom to walk around the hangers. A sectioned Merlin engine kept my attention
for several hours and a sectioned jet engine too. While we were there, a small
aerobatic plane that the pilots fly, as it most closely replicates the Spitfire, went out into the runway
just yards away.
At dinner break I was able to get close
to the Spitfire and was given a personal explanation of the controls while
stood on the wing. Unfortunately, getting to sit inside the cockpit was a bridge
too far but what an excellent day.
The car was very much co-star with the
Spitfire taking the lead role and she behaved perfectly. We can’t wait to see
the finished painting in 2020.
GOING TO THE CHAPEL AND WE’RE GOING TO
GET MARRIED…….
The next event was as a wedding car…. some time ago a work colleague of Mel’s had mentioned he was getting married and Mel mentioned our TA should he not get sorted with anything else. I would never have thought of a TA as a wedding car but in August that is what it became……we tied some ribbon around the little car and it did look really smart. This time I was even more apprehensive than at any other time, having the responsibility to get someone to their wedding and the thought of spoiling their big day was a bigger pressure than I could have imagined.
On the day itself Mel followed me in her
modern car and just to be sure, the Groom’s brother followed behind Mel too!
The weather wasn’t great but we tried to be brave, keeping the roof down until
one particular heavy shower and the roof had to go up. That wasn’t the biggest
problem though….I pressed on and when I got to a particularly tight corner
and we experienced a “little rear end slide” the groom looked a
little startled (I think it is something he will recall for some time!) and
from that point on I only managed the dizzy heights of 20 mph before he looked
very uneasy and suggested that we were going quite fast enough! I protested we
were only doing 20mph and he replied “that’s it, 20 it is then” so we
continued on our way very slowly even for a TA! The groom arrived dry and safe
at his wedding venue, but he did reach rather quickly for the bottle of beer
that the event staff offered him on arrival!
FACTORY ORIGINAL MG T SERIES….BOOK
Last year we responded to an advert in
The Octagon Bulletin regarding members’ cars suitable for a revised book
that was being re- written by Anders Clausager……..we were accepted and a
professional car photographer came to take loads of pictures of our little car
during one day in 2018……. we didn’t hear anything for a while, but hoped
our little car may get a mention inside the new book.
One night during August this year Mel was looking on the Internet and found the new book publication details along with release date…I couldn’t believe it when I realised it was our car gracing the front cover……what an amazing surprise and what an honour!
PRE-WAR PRESCOTT
Next in the calendar was Pre-War
Prescott …I know this event is well supported by the Octagon Car Club so I
won’t go into detail, but just to mention that this is an excellent event that
you should really consider if you haven’t yet been… the entry form for 2020
is on the Pre-War Prescott website http://prewarprescott.com/
On the Sunday there is also a scenic tour around the Cotswolds ending with a cream tea at Stanway House …….after a full weekend we returned home after another 450 trouble free miles.
Kev in TA0375 pictured just off the road
in the Gloucestershire countryside during Pre-War Prescott weekend in 2019.
TOUR OF MID WALES
The final event for the TA in 2019 was
John James’ Totally T-Type 2 event in Mid-Wales. With Brian’s support this was
another brilliant event and an excellent opportunity to catch up with old
friends and make new; as always, we had a great time. The weather was amazing
for a Bank Holiday weekend in Wales. The routes and scenery were tremendous and
provided ample challenge for car, driver and navigator. Look up The Devils
Staircase
…….which reminds me of another job I
need to do on the TA……improve the brakes!
To say the little TA was trouble free
would be a slight exaggeration as on the second day my less than perfect gear
changing seemed to be getting noticeably worse…….I soldiered on, blaming
myself but on the way home from the event things continued to get worse. A
quick stop and a check under the bonnet revealed the clutch rod adjusting nut
had backed off, a quick tighten up and magically I had a working clutch again
which improved my gear changing abilities dramatically.
REFLECTIONS:
What a brilliant year …“I love
old cars”!
My reflection on classic car ownership
is this…….through all the trials and tribulations we have a great time with
old cars, long may it continue. But, in reality it’s all about the people……special
thanks to Mike Glendenning and his long-suffering wife Penny without whom I
wouldn’t even get out of the garage. Brian Rainbow and John James for
organising such great events and Brian for all his technical help and advice
and his willingness to share his knowledge. And of course, all the friends that
Mel and I have made these last few years and who we look forward to catching up
with every year…without the TA we wouldn’t know such lovely people and our
paths would never have crossed.
So, winter has arrived and it’s back
into the garage for me preparing already for next year … 50th Beamish event,
Pre-War Prescott, TYMC Eskdale safety run are already booked……look forward
to seeing everyone in 2020!
Kev (and Mel)
Editor’s note: The referenceto “Blower” will be
understood by most readers, but may not be by some. The “Blower” book covers
MGs from the M-type to the TF1500. It is a compilation of extracts from
Instruction Manuals, Workshop Manuals and (some) Service Information Sheets.
I’ve had mine for over 50 years and it is well ‘thumbed’ and falling apart!
…….and
now a note from Mel about Beamish
The 50th Beamish Reliability Run will take
place on the 3rd Sunday of June 2020…it is always held on this date which
coincides with Father’s Day and also the nearest day to the summer solstice to
offer maximum daylight for the competitors……
.
Kev in his much younger days used to
spectate at this event along with his dad and the crowds around Muker (the
vehicles passing through this Swaledale village twice). Then, watching All
Creatures Great and Small a dream started to form about owning a car like
Tristan Farnham (Peter Davidson played the part) a little MG……. Little did
Kev know that in June 2014 we would be actually taking part in our first ever
Beamish Reliability Run and how naive we were….our 1936 MGTA arrived on the
8th June 2013 and in June 2014 we were taking part in our first Beamish Run
along with our friends Mike and Penny and we have taken part ever since. I will
never forget our first encounter of the Stang as it appeared around a corner,
the bank covered in spectators and Kevs face as he frantically tried to select
a suitable gear for the ascent and the hairpin bend in front of us……..worst
was to come with Silver Hill!!!
So, what is the Beamish Run? It’s
described as the North’s premier old motoring event for vehicles manufactured
up to 1956. It is probably the oldest and toughest regular event for old cars,
motorcycles and light commercials certainly in Britain……this is no Sunday ride
out, it will challenge you and your navigator throughout its 155-mile route.
The hills and dales of the route were
once the test grounds for the then infant motor vehicle both, before and after
the Great War period. The route now runs 155 miles to incorporate most of the
old former trial routes.
Interested?……then time to get the
road atlas out and start G………oogling……The route starts at the Beamish
Museum then winds its way through the charming and unspoilt County Durham
countryside and forested areas to Barnard Castle, said to be the gateway to the
Dales. There is a fabulous checkpoint under the French chateaux style portico
of the award winning 19th century Bowes museum. You then enter the Yorkshire
Dales over the Stang forest hills and into Arkengarthdale through the famous
Herriot water splash (remember the opening credits of All Creatures Great and
Small?) turning for Low Row and
Gunnerside then the Buttertubs Pass via Muker onto Bainbridge for a one-hour
lunch stop.
Onwards to the Tan Hill Inn, Britain’s
highest pub at 1732 feet above sea level then entering Cumbria towards Brough,
on to the Durham Dales and into Weardale. The route ends at the Beamish museum
where you drive through the actual museum itself down the cobbled roads and tram
lines, through the village and onto the finish line.
Prior to finishing you will have been
questioned at 9 checkpoints where you must stop to be quizzed by check point
marshalls – using the Highway Code of today, and yesteryear plus motor history
and maintenance. You will have
completed
6 severe hill tests (look up Silver Hill near Keld, The Stang Hill just past
the Bowes museum, Askrigg Town Bank, to name just a few). Your driving will
also have been observed and scored via both open and secret observed sections.
This year 165 vehicles took part. When
the weather is fine spectators can be viewed all along the route particularly
on the many village greens and around the severe hill tests.The crowds are
usually out in force at the Romaldkirk checkpoint where the village hall opens
for amazing cakes and teas.
Entrants receive a detailed route book
including safety advice, and an entry number.
Around July a letter will land through
your letterbox advising of your score, along with an enamel badge and year bar
(gold, silver, bronze or red for did not finish) there are also many class
trophies to be won and an overall trial winner who receives the magnificent
Beamish Enthusiasts Trophy awarded by the Jolley family.
If you think you would enjoy taking part,
go and drive the route in your modern car to enjoy the scenery of the area and
also to get a taste of the challenges you will be facing in your vintage car.
To enter a vehicle please contact:
George Jolley Hon. Secretary 12, Celtic Crescent Cleadon Village Tyne and Wear SR6 7RZ
0191 5360929
Further information
can be found on the NECPWA Motoring Club.
I know of some people who put
de-humidifiers in their garage over-winter to help keep things dry. At first
sight this appears to be a good idea. However, they have the potential to cause
far greater harm than dampness will.
When trying to keep your car dry, the critical value is the Dew Point, the temperature at which water condenses out of the air. The Dew Point is dependent on both temperature and relative humidity. For example, at a 60% relative humidity:
Ambient
Temperature
Dew
Point
Difference
80°
F (26° C)
63°
F (17° C)
17°
F (9° C)
50°
F (10° C)
38°
F (3° C)
12°
F (7° C)
At 80% relative humidity:
Ambient
Temperature
Dew
Point
Difference
80°
F (26° C)
73°
F (22° C)
7°
F (4° C)
50°
F (10° C)
45°
F (7° C)
5°
F (3° C)
The
key to preventing condensation is to keep the temperature of your car above the
Dew Point, the greater the temperature difference, the lesser the chance of
condensation.
The foregoing table shows that at 60%
relative humidity, there is approximately 15° F (9° C) difference between the
ambient temperature and Due Point. In other words, at 60% relative humidity,
the temperature would need to suddenly drop by around 15° F (9° C) before
condensation would form on your classic car. Unfortunately, at 80% relative
humidity, more typical of a UK winter, the temperature only needs to fall by 6°
F (3° C), making condensation more likely. This is why we often get damp winter
mornings in the UK.
One option is to heat your garage rather
than use a dehumidifier. Unfortunately, installing a heater to increase the
temperature, also increases the Dew Point. Lowering the Dew point (i.e.
reducing the Relative humidity from 80% to 60% at 50° F (10° C) is over twice
as effective as raising the temperature to 80° F (26° C)). Even with their lower efficiencies below 50° F
(10° C), dehumidifiers are probably the most cost-effective solution.
When I rebuilt my TC
nearly 15 years ago, I considered a dehumidifier to keep it dry. Unfortunately,
just installing a dehumidifier in a garage will serve little purpose, unless
the garage is sealed. Nature abhors inconsistencies, so as the air in the
garage becomes dryer, water vapour will increasingly seek to “fill the space”.
This could come from the air outside the garage or drawn in through the floor
or walls.
A dehumidifier will need to run 24
hours/day 7 days per week in its unsuccessful attempt to remove this moisture. There
is one case known where the dehumidifier burned out and caught fire!
Fortunately, the classic car was not totally destroyed.
After considering the options, I choose the Permabag storage solution. https://www.autopyjama.com/permabag-engl/cars/
As the website says, this is basically a large bag, sealed with a
zip that you put your car into, along with two large desiccant cylinders. This
serves the same purpose as a dehumidifier, the main difference is the car is
stored in its own sealed bag. The desiccant cylinders only need to dry the air
in the bag.
As a test, I took a piece of mild steel, aggressively cleaned it
with a wire brush, cut it into two parts and degreased each half. I placed one
half on the floor outside the bag and the second piece about 6 inches away, but
inside the bag.
The Permabag is a
relatively expensive to buy, but has almost zero running costs. The desiccant
cylinders can be regenerated any number of times by baking them in the oven.
Mine require one regeneration for the whole winter period. It also comes with a
temperature gauge/humidity meter that is fitted inside the bag, which in
combination with a supplied graph that plots humidity against temperature,
tells you when the cylinders need regenerating. The big advantage is that you
do not need to leave electrical equipment powered on inside your garage over
winter.
The disadvantage, although the bag will unzip all the way around,
getting the car into it can be awkward, especially if you do not have much room
in your garage.
The only addition I would recommend is a soft car cover to protect
the paint from the plastic bag. The
photographs show my TC “bagged up” for the winter. Also note (bottom left
first photo) the barrel of Sunoco Optima 98 – ethanol free storage petrol
used to protect the fuel system components.
So, what about the pieces of mild steel? Before you look at the
photograph, I should tell you that I live about 10 miles North East of
Britain’s official semi-desert. Hard to believe, but one tiny corner of the
South East of England has so little rainfall it is classified as a semi-desert.
So, for those of you in the wet North East, imagine how much worse the piece on the right would have been had it been exposed to a damper climate. (The two silver “dots” are the heads of aluminium rivets I put into the steel to “enhance” the effect of corrosion.) Needless to say, the piece on the left is the one that over-wintered inside the Permabag.
Certainly, for me the evidence is clear, the Permabag was a wise investment.
Steve Priston
described in Issue 56 (October 2019) his attempts to improve matters with hot
fuel under the bonnet. This included re-routing the fuel hoses to the
carburettors by swapping the float chamber tops over, enabling him to run the
feed to the front float chamber around the back of the air cleaner, so that
being nearer the bonnet louvres, it was away from being directly above the
exhaust manifold.
Regarding the
fuel hoses themselves, he made
some new hoses in 6mm bore, reducing the hose stored fuel volume, by around 40%
per inch.
The fitting of a Facet fuel pump rendered the SU
pump redundant with another small reduction in under-bonnet stored fuel.
As a further development he decided to try fitting pancake filters on the
assumption that they would draw in cooler air than the standard arrangement,
which being situated at the highest point under the bonnet, would surely
pull in the hottest air, rather than being as far away from the exhaust/engine
heat, as you can get.
A pair of foam type pancake air filters,
were purchased. Also sourced was a pair of replacement outer covers, in order
to create the required offset hole to miss the radiator support strut.
“All in, having bought filter assemblies that were sold on eBay, as seconds, along with the two extra covers, the cost was £23. Yes, they are almost certainly made in China and yes, they needed a bit of finishing off, but they are stainless steel as well as being cheap!” said Steve. Having studied Brown & Gammons heat shield, along with one featured in a restoration book, that fitted to the manifold clamps, the heat shield you see in the picture below was fabricated using a piece of 3mm alloy.
Rather than resort to a cardboard template the inlet manifold was measured up (7 3/16” centres) and a SU gasket was used as a template.
Two spacers, made from
Tufnol were cut from some 6mm material, with paper gaskets fitted between
everything, and with the addition of ‘Wellseal’.
Steve is hoping that the
front lower bend in the heat shield, will help direct an airflow, between the
shield and the manifold, also that the alloy will help to dissipate heat, more
effectively, than steel.
To fit the carburettors, it
was necessary to use a couple of M10 studs for the lower fixings, due to the
lack of room, preventing the fitting of a long enough bolt.
The carb to carb hose has
been moved again, now being lower and about as far away from heat, as it is
possible to get, being about the same length now, as the original.
All that is needed now, is to find a suitable breather, to screw into the rocker cover and for the weather to improve for road testing. The pancake filters make tuning of the carburettors much easier, with only a couple of 6mm nuts to undo on each. Steve has come up with an easy way to check/compare the air flows, which is to use a cheap (yes eBay!) stethoscope but not with anything other than the open, lower piece of tubing, held in the carburettor mouth, so a much clearer sound can be heard when listening for a difference in intake roar!
When the true horror of the condition of his purchase of an
ostensibly sound TC was revealed, Ray White vowed to completely rebuild it –
he’s got off to a very good start…………
“I had just said good-bye to my 1926
Dodge Brothers tourer, the restoration of which had been a big part of my life
for the past seven years, and I was suffering from the usual withdrawal
symptoms. Then one morning, my wife noticed an advert on the internet. “What
about this?” she asked.
Under a photo of a shiny red MG TC was an intriguing description. “Genuine rust free 1949 matching numbers car. Only 25,000 miles. £18,000.”
TC10030 on arrival at Ray White’s
home – looks good, doesn’t it!
It sounded too good to be true but I
simply had to find out more. I arranged to see the car that afternoon………much to
the surprise of the owner, who had just placed the advert and had not expected
such a quick response!
The MG worked its magic. They
do that, don’t they? I overlooked all the warning signs and latched onto
every word the owner said. He was a most convivial elderly chap, quite
disarming in a way and I believed every word he said. The engine had been re-bored,
the crank reground and he had fitted all new wood. I just wanted it all
to be true. But it wasn’t.
When
I got the car home and started to investigate some of the more obvious problems
that I had previously dismissed, the truth began to dawn on me. I had
bought a ‘lemon’. Underneath the smart new leather trim, the wood had indeed been
replaced … but with firewood. The body had been basically bodged and
painted straight over rust. It was scrap.
Worse was yet to come. The
engine had good oil pressure but then gear oil has that effect! The crank
had been fitted to a dirty engine and would need a regrind. The block had
not been re-bored – in fact there was 0.027” wear in the bores, one of which had
been relined as a result of a seizure at some time in the distant past.
Some things were original. For
example, the tyres and the oil filter were genuine 1950s items still in place!
The gearbox had been run with no oil and the rear axle could at least be sold
for scrap. I won’t bore readers with more tales of woe; the list is far
too long.
Every cloud has a silver lining.
In the case of TC10030 it was an opportunity for me to build an MG TC
from scratch – but to my own design. Fortunately, the chassis is pretty
much rust free and reasonably straight.
Once the car had been stripped down,
the chassis just required prep and paint – although one of the scuttle mounting
brackets needed replacement and Pete at Octagon spares service went out of his
way to find me one!
When it comes to bodywork, I am
happy to entrust the job to Andrew Denton of MG Ash Frames in Yorkshire.
Andrew is a qualified pattern maker with many years’ experience working
on MG frames. He knows his stuff! He will be supplying a complete
body including doors and a new dashboard. He is also making new floor boards.
I have so far renewed the king pins
and bushes. but instead of the usual thrust washer I have fitted needle roller
bearings. Having crack tested the spindles I will be fitting the front hubs
with taper roller bearings. I will also be replacing the drop arm and
track rod ends.
Other parts that I have bought ready
to install are a new bronze master cylinder and bronze wheel cylinders with
Alfin type drums all round. A Panhard rod from Roger Furneaux will stabilise
the front axle and the springs will be refurbished with poly bushes. The
rear springs are to be renewed and the Luvax shock absorbers are currently with
“good bloke” Raj Patel in Leicester.
I
am awaiting new “improved” brake shoes from Peter Edney. He is restoring
my engine which will have a +0.030” rebore and quality pistons; a reground
crank and new bearings; cylinder head shaped and ported with bronze valve
guides, TF valves and springs and converted to unleaded. I have ordered
an Eaton M40 supercharger from Steve Baker which will be mated with a stainless
exhaust system including an extractor manifold. I also have invested in a Peter
Edney fast road camshaft with new bearings. The fly wheel will be slightly
lightened and everything balanced.
As
the electrics were incorrect, I am fitting a new wiring harness from Auto
sparks and a 45amp dynamator with electronic distributor with sports coil.
The loom has indicator wires included.
I
recently collected a five-speed gearbox conversion kit from Peter Gamble of
Hi-gear Engineering near me in Derby. I have opted for a modified higher first
gear and reversing light switch. On dismantling the axle pinion assembly,
the front bearing cage collapsed and ball bearings fell out all over the bench!
I also discovered a broken pinion tooth.
A
replacement crown wheel and pinion kit with taper roller bearings and thrust
bearings has arrived from Roger Furneaux in Devon. I have opted for the
TA 8/39 higher ratio. I will also be fitting his ingenious sealing hub nuts….
the half shafts need to be crack tested.
It
may not suit some people but I am changing the layout of the dashboard.
The original board has long since been replaced with a “best guess”
version so I will have a new one made and as I don’t like the original vinyl
covering, mine will be wood. I have bought a new bronze coloured dash
panel from Andy King and intend to fit cream switches and knobs. A new 151/2”
cream Bluemels Brooklands steering wheel will complement.
My
original instruments are being restored by John Marks of Vintage Restorations
in Tunbridge Wells. He owns the British Jaeger brand. In addition to a
dual water/oil gauge, I am having a boost gauge for the supercharger and a
petrol gauge which will complement the low-level warning light. The
sender unit is a dip tube type that will fit in the top of the tank at the opposite
end to the filler. I have ordered another filler cap that can be fitted
over the sender unit to disguise it. The effect is a dual filler tank……quite
sporty, I think! John will also be modifying the ammeter to handle
the 45 amps alternator output. There will also be improved back lighting.
Although
the interior is complete; the seats don’t match so I will be recovering them in
matching’ biscuit’ leather. I have also taken delivery of a new hood and
side screens finished in matching ‘Stay fast’, but although the frames are
present it is a job that can wait.
The
chrome plating will be farmed out but I shall be painting the car myself.
I have chosen Reno red cellulose but the biggest challenge will be all
the preparation. I hope to have it all done by this time next year.
TC
10030 was built in November 1949 and exported to Australia. The first
owner is not known but what we do know comes from Allan Gallard of
Woolamara who owned the car for about 10 years.
He bought it from one Les Johnson of Mount Colah, nr. Hornsby, NSW.
Les had inherited the TC from his brother Don who had raced it.
When Alan bought it, the car had been off the road since being totally
dismantled in 1960. The registration number back then was BGZ 773 and
this is confirmed by a registration sticker that is still on the windscreen.
(A great piece of history!).
Alan
advertised the dismantled TC on Ebay as being suitable for restoration or
spares. “Not for the faint hearted” was how it was described. The
remains were purchased in 2016 and repatriated to England. An age-related
registration mark was obtained for the car once it has ‘so-say’ been rebuilt.
I purchased the car on June 6th this
year. I had been looking for a TC for some time and when this one appeared in
‘Classic Cars for Sale’ I jumped in. I was the first to see the car and
believed the story I was told of the ‘rebuild’!
I
was pleased when Allan Gallard came to look at the car on a visit to England.
He had been in contact with Les Johnson and I am hoping that a photo of
Les’ late brother Don with the TC will be sent to me. Evidence of the car’s
competition history is a photo of Don with Stirling Moss back in the 50s which
would be another nice bit of history to go with the car- if I could get hold of
a copy!”
Ed’s
Note: Since sending me the article Ray has invested in a new pair
of half shafts and hubs with taper fit from Roger Furneaux (he found the
originals had been stuck together with glue!!). He’s also replaced the
front hubs and fitted taper roller bearings. The chassis, back axle and
back plates are all now in new paint.
Also
renewed are the rear springs and shackle pins with the front ones having been stripped,
sand blasted, refurbished and installed.
The track rod and drop arm ends have
been replaced and a VW steering box conversion sourced. A heater will be
fitted.
Prevention is of course, better than
cure, but if your XPAG or XPEG leaks from the rear main crankshaft seal and you
don’t want to spoil your (or someone else’s drive) then help is at hand.
I am asked from time to time where these drip trays/catch tanks can be obtained and I refer the enquirer to Bryan Purves in East Sussex. http://www.bryanpurves.co.uk
Bryan took over the manufacture and distribution of these trays/tanks from the late David Pelham, who developed them (David used to call them “nappy buckets”).
Having
spoken recently to Bryan he confirmed that he has plenty in stock and the
current prices are 55 GBP (UK) and 58 GBP (Rest of World) inclusive
of postage.
Items
made to order by Mick Pay
TA owner, Mick Pay, is still providing a
range of items – these are shown pictorially later in this issue. Some of the
items are listed below:
Petrol filters – these are in great demand as they are
suitable for any pre-war small car or motor bike. Also supplied is a filter
with 5/16 compression fittings for attachment to the petrol pump.
Copies of tax discs and labels
for spare oil cans.
TA engine restraints – many TA owners will already have
these, either supplied directly by Mick, or purchased through the trade.
TA & VA oil filter conversions –best to speak directly to Mick
about these.
Slow running cable
adjusters – for MPJG engines – Mick
says thatthe little slow running cable adjusters
are quite useful as it is much easier to adjust just right. He adds that he needs
to think how he could adapt them for TCs etc.
Also supplied are brass
brake fluid reservoirs and a repair service for T-Type rev counter gearboxes
(but see the full page of colour pictures later in this issue for specific
details).
Ron Ward is a time served toolmaker
(ex-Standard Motor Company) who has spent his working life in the machine tool
industry. He is the owner of a much modified TC (90+bhp un-supercharged) which he bought in 1984 as a ‘basket case’.
Ron builds 4 to 5 XPAG engines per year
and currently has the following:
TC engine – Late block linered and bored
72mm, pressure tested, late crank std/std, crack tested, lip sealed front and
back on speedi-sleeve, steel ‘spider’ flywheel, diaphragm clutch, all balanced,
big sump, 280 fast road camshaft, Vernier timing sprocket set, stage II big-valve
unleaded head.
Next build (TD/TF) – Late
block bored 1380cc, lightened and balanced, lip-sealed, fast road camshaft,
unleaded stage II big valve or Laystall aluminium head.
Have available fully refurbished period
Laystall aluminium head.
Feel free to contact Ron for your
requirements on 01422 823649, or 07790 458386, or e-mail valerieandron(at)gmail.com [please substitute @ for (at)].
Mirror re-silvering
Frank Shore has been in touch with the
following:
“The silvering had deteriorated on one of the wing mirrors on my TC. I googled and found this business which re-silvers mirrors.
Contact details are: Daniel Frater, Mirrorworks, Alma Yard. Alma Street. Shrewsbury SY3 8QL and email is [email protected]
I
sent the mirror glass (wrapped in lots of bubble wrap) off and 10 days later
the newly re-silvered mirror arrived back all for a price of £35. Mirror looks
good and I’ve attached a photo. I highly recommend this service, which
may be of interest to other members.”
New Book ‘Factory-Original MG T-Series’
The editor has a supply of
this new book. The list price is £40, but it is being offered for £27.50 plus
£3 UK postage. For an overseas postage quote, please e-mail the editor at jj(at)ttypes.org [please substitute @ for (at) and note
that the address begins JJ but in lower case and not ii].
The
books will be on sale at Stoneleigh in February.
Fuel Stabiliser Products
I
recently noticed a reference to these products on the MGCC Triple-M forum. STA-BIL
was mentioned as one of them www.sta-bil.co.uk
The product
description on its website reads:
“STA-BIL
Fuel Stabiliser is a fuel additive that keeps fuel fresh for quick, easy starts
after periods of storing your car, motorcycle or lawnmower. Fuel Stabiliser
eliminates the need to drain fuel before storage and protects your engine from
gum, rust and corrosion. These problems can afflict engines after petrol left
in the tank has broken down and has not been treated with a fuel stabiliser.”
Seems like a good idea to me, especially as I’ve had 7 gallons in the tank
for the past few months and the car has not been used for a while!
My confidence in the product has gone up, knowing that a Triple-M owner,
who I have known for many years has used it successfully in his cars and
reports favourably on its use.
Another product available is Briggs & Stratton 100119 Fuel
Stabilizer. It claims to preserve fuel for up to 3 years without going
stale. Sold in 16 oz bottles, it has the capability to treat 80 gallons of
petrol (the STA-BIL 16 oz bottle is said to treat up to 40 gallons).
Other
products on the market are:
Star Tron Enzyme Fuel Treatment Stabilizer Concentrate PRI Fuel Stabilizer for Gasoline Royal Purple Max-Clean Fuel Stabilizer System Yamaha Fuel Stabilizer & Conditioner Sentry New Technology Fuel Stabilizer Maxima 89901 Fuel Stabilizer Additive
It is well worth having a look at. The article declares that its ‘Top Pick’ is STA-BIL.
PROPSHAFT SERVICES
I have had good service from this company. They have made me new prop
shafts for both my PB and J2. It was necessary to make new ones due to the
fitting of an overdrive to each car.
Readers in the South West may wish to note the contact details.
PETROL CAP REPAIR
The
petrol cap on my TF had lost its sealing ability due to the cork seal having
disintegrated.
As can be seen from the picture, there is no seal sandwiched between the
two dish shaped metal parts, which are pinned to the base.
To fit a new seal, it was necessary to remove these parts; the only way
to do this was to drill through the pin.
Having done this, it was necessary to drill and tap (1/4” BSF) to enable the parts to be re-attached. However, it was not that simple because by now the base was rotating. Therefore, some silver solder was used to stop it going around.
The
parts in order of re-assembly. In the absence of Loctite some superglue was
squirted down the base which had been drilled and tapped.
To provide the cork seal I had to buy a roll of it measuring 12” x 24” x 0.9” (30.5cm x 70cm x 2.4mm) so if anybody wants some, they are welcome!
Here’s the finished petrol cap, which fits a treat and I no longer smell petrol when I raise the garage door.
Connecting
up the coil
The following
has been received from Michael Sherrell.
“As
usual, Peter and Eric have smashed this one. For what it’s worth, I wrote this
before TTT 2 Issue 57 came out.
In my
opinion, Steve Priston’s problems or symptoms are coming from somewhere else.
Swapping the connections to the coil would not be the cause.
Let’s
employ Ockham’s Razor to the problem. It’s not that
complicated. Connecting the coil ‘the wrong way around’ simply means the DC
current flow through the primary winding is in the opposite direction. There is
no difference in the current level (or strength) through the coil.
The
only effect a reverse coil could have (as far as I know) would be to cause the
electrons to exit the spark plug external electrode – the bit you bend to
adjust the gap – and therefore deplete (erode) it, instead of the other way
around, where the loss would be negligible.
(Or
is it the other way around? During the time we were trying to absorb Applied
Electricity in the 50s, electron flow was magically reversed: first from
electrons moving towards ‘holes’ – to holes moving toward electrons. It was
early days).
Another
place where a loss of metal occurs is from the centre of the dizzy Rotor. I’ve
seen plenty of evidence of that, but that is in the HT circuit. It may be a similar
problem, but probably has a different cause.”
Ed’s
note: “Ockham’s (or Occam’s) Razor, also known as the
Principle of Parsimony, is the idea that more straightforward explanations are,
in general, better. That is, if you have two possible theories that fit all
available evidence, the best theory is the one with fewer moving parts.”
As a
follow up to the Peter Cole/Eric Worpe article in Issue 57and noting Michael’s comments
above, Eric has provided me with the following:
From a thermionic point of view current, and hence
electrons, flows from the cathode to the anode, which is why the cathode was
heated up in good old valves to improve its (work function) emissivity. So,
heat encourages the spark discharge from the central electrode of the spark
plug, hence spark plugs carrying a heat range specification. Hot plugs for oily
engines and cold plugs to prevent pre-ignition in high performance engines (I
think).
Peter and I came to the conclusion that providing a negative pulse to the
spark plug might only be useful at high engine revs when the reduced time for
the current in the coil to build up, results in a reduced EHT. The second most
demanding time for firing the spark plug is when starting from cold, as the
battery voltage is reduced and the central electrode is cold. This would
suggest that a hot central electrode is not that important at low engine revs.
The air gap between the rotor arm and the terminals in the
dizzy cap serves a useful purpose if the plugs are fouled up with carbon
deposits. The carbon can cause the energy in the EHT wave form to leak away
before sufficient EHT has been reached to fire the spark plug. The EHT wave
form consists of a sine wave, so the limited slew rate of the leading edge is a
disadvantage. However, with an additional spark gap, the EHT rises to a level
that eventually jumps the additional spark gap and therefore presents the spark
plug with a fast leading edge EHT pulse. This reduces the effect of leakage
across the spark plug. Old hands would sometimes clear a fouled plug by holding
the EHT lead away from the terminal of the plug by about a 1/4″.
Garage labour charges
Eric Worpe was very
taken with an enamelled sign he saw at a recent Kempton Park bike jumble with
the heading ‘Car Repairs’. He regrets not having bought it, but the stallholder
was busy and it was a cold day to stand around waiting:
“Mechanic’s
hourly rate is £100.
£125
if you want to watch
£150
if you’ve worked on it before
£200 if you’re
going to tell me how to do it.”
Fitting
tapered roller bearings to the front hub
I have a data sheet from Timken bearings which I received back in 1985.
It advises that end play should be between 0.050mm
(2 thou) and 0.150mm (6
thou). I have read elsewhere that end play should be between 0 and 4 thou.
What is not in dispute is that there should not be any pre-load, but
there should be a minimum amount of end play.
However,
the question is ‘how do you measure end play in this situation?’
TD5685 back from sandblasting
This is Matt Sanders’ TD5685, which has just returned from the
sandblasters. Matt wrote the article entitled British Racing Green – so what is the correct shade? in the last issue. He tells me that he has
obtained a 5 litre can of the Connaught racing car British Racing Green, colour
matched from an old Valspar colour no longer available.
The TD should look really nice in that colour.
TD25045 now in Germany
This is Marek Rossmann’s TD with one of his
sons at the wheel. Marek had just purchased the car from Junction 59 Classics
in the UK and was having trouble registering it for classic status in Germany.
I was able to help out with a suitable letter to the German Registration Authorities
on Octagon Car Club headed paper. Sorted!
Dave’s Doughnuts
I have plenty in stock!
To order, please send an e-mail to:
jj(at)ttypes.org the
email begins JJ but in lower case; [please substitute @ for (at)].
Parts for sale and wanted on the ttypes.org website
This section of the website is a useful facility for those wishing to
advertise their parts for sale or wanted. Parts are advertised and bought and
sold worldwide. I try hard to keep it up to date, but I am not always told when
sales or ‘wants’ have been met.
One subscriber who did tell me was Marv Proctor in the US; Marv had advertised
a steering arm for a TF, which went to Tasmania, helping to keep another TF on
the road.
There is also a ‘Cars for Sale’ section on the website.
Tracing
the current owner of a once owned MG
It seems that my paragraph in the last issue may have been based on a
misunderstanding. There was an article in the November issue of Enjoying MG,
the monthly magazine of the MG Owners Club. The article described the efforts
of a grandson who was successful in tracing the owner of his grandfather’s TC.
However, it may have been written, based on previous experience of the time
when DVLA used to provide this service, but sadly no longer do.
At the time of writing I am seeking clarification.
Bah, humbug! – worth a chuckle or two!
This was sent to me by Mel Howe. Unfortunately, it was not received in time to make the December issue.
It rather reminds me of the time when I painted my TC’s back axle casing
on the dining room table. I have the photo somewhere – I must dig it out!
The current state of the UK market for our cars
The market is pretty ‘dead’ at the moment – some may say dire.
I have never seen so many cars on the MG Octagon Car Club website. If
you take a close look at the models, it is noticeable that TDs and TF1250s are ‘sticking’
badly.
The Triple-M website also has quite a record number of cars for sale,
with, in my view, some silly prices being asked by some.
There is probably no single reason for this state of affairs, but Brexit
and political uncertainty have surely been contributory factors. Perhaps it is
also down to some of us all getting old together and deciding to call it a day.
Perish the thought!
All Ian Ailes wanted for Christmas!
Well, I’m not sure if Ian got what he wanted. Just a hood and
side-screens are needed to finish the car.
Derbyshire Police TCs
I have been in touch with Jonathan Shepherd, who owns ex-Derbyshire police TC (JRA 250), pictured below.
Jonathan wondered what had become of JRA 253 as he has some period correspondence about Derbyshire police TCs which mentions this car.
This led me to research if there were any survivors seen in the picture
of the six Derbyshire police cars being collected from the factory in January
1946 (see picture). It looks as though three are known to have survived,
with possibly one more as a chassis only. Happily, JRA 253 has survived.
The details are as follows:
Chassis no. Registration mark Survivor?
TC0341 JRA
250 Yes
TC0342 JRA 251 Not Known
TC0343 JRA
252 Chassis
only?
TC0344 JRA
253 Yes
TC0345 JRA
254 Not Known
TC0346 JRA 255 Yes
The picture shows the six TCs being collected from the Factory in
January 1946 (the cars were built on 18th December 1945). The man
wearing the trilby hat is Inspector George Holmes, who was in charge of the
Derbyshire Constabulary Motor Patrol Section. The two gentlemen with him are
M.G. men, possibly the shop foreman and the General Manager. Those standing by
the cars are Police Officers who would have driven the cars back to Derbyshire.
In a letter to the owner previous to Jonathan Shepherd we get an interesting
insight into the use of the cars from ex-serving officer D. Burgoyne. He was
allocated JRA 253 and when stationed at Buxton, was virtually the sole driver
of the car from 1946 to 1948.
As a young constable, Mr Burgoyne said that he “thoroughly enjoyed
working on MG cars, but on reflection, they were a most unsuitable car for our
purpose, particularly in the Peak District in winter time.”
He added that with Buxton and North Derbyshire getting
its fair share of bad weather in winter “a car with MG type side windows let all
the cold air in.”
To close the ‘Bits & Pieces’ feature of this issue I offer a tip from Gerrit Gartner TD and TC owner in Austria.
Gerrit is not very tall and suffers from cramp in his right leg from
driving his TD. He says “I simply put a piece of wood, 1.5“ thick, maybe 10“
long, under the carpet, in front of all pedals. With the heel now raised, no
problems any more.“
Peter Barnsdale (a Brit working in British Columbia) is hoping that
someone in the US might be able to shed some more light on his TC’s history.
Peter bought the car at auction near Tacoma, Washington and imported it to
Canada.
Originally exported to (Peter thinks)
California, he was told that the TC had been latterly looked after by a
Californian family for 20 years before being reputedly sold to a film company,
who held onto it for a couple of years before it went to be advertised
unsuccessfully and finally sold to Peter at Auction by ‘Lucky Collector Cars’
in Tacoma.
The upended trailer in the
background is being cleaned up ready for a respray when the picture was taken.
In Issue 55 (August 2019) when making an
enquiry about a TF1500 (chassis number unknown) owned by Colin Lamdon in
Bulawayo, I said that according to Clausager, there were no TF1500s exported to
(the then) Rhodesia.
I
subsequently received information from Alastair Stevenson, who bought his 1500
in Rhodesia in 1960 which contradicts Clausager. Alastair has seen an old advert placed by the main BMC garage in Salisbury (Harare) asking
people to come and test drive the new MG TF1500. He is also doubtful whether
any TF1500s were imported into South Africa (unless anybody can correct him).
This is based on the recollection of his time at university in South Africa;
there was another 1500 on campus, but he did not know where it was bought.
Alastair’s chassis number is HDE23/10081 which would make it the 19th from last to be built, and is a RHD export model. He subsequently brought it with him when he immigrated to the U.K. and sold it 1965/66. It was bought by the late Ian Lloyd, restored and kept by his family for many years. When Alastair saw it for sale at Beaulieu garage, he just had to buy it back, as it is the only car that he regretted selling.
TC4428
TC4428 was sold new in South Africa alongside TC4427, still in SA and owned by Viv James. Ralph
Littlefield would like to track
its history, but he hasn’t been able to make the South Africa connection between
1948 and 1980.
4428 was
among several cars exported South Africa to New Hampshire, United States in
1980; others included Mercedes Benz 300SL and 300SL Gullwing. Ralph had hoped someone might have
remembered a transaction like that, but to date no luck.
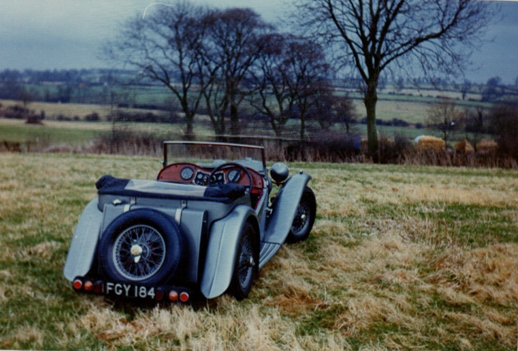
Information was sought in the previous Issue
but I didn’t have a photo. Just to refresh, Paul Richmond is trying to locate the whereabouts of his late
father’s TC (see picture). He owned it from 1947 until 1953, when he had
to sell it – the impending birth of Paul’s older brother meant a more family
friendly car was required! The car was originally green, but was restored and
painted red in the nineties and last heard of in Sheffield in 2013. Contact
Paul on 077 3148 0291
John Scott would like to try and track down his father’s TA – his dad, who died in 2019, is the one on the left in the pic. The TA was, when he had it, registered in NI as FZ 1835. Owned in the mid-50s he circumnavigated Ireland in the car, among other things (hence the camping equipment across the spare wheel!). John knows that it was not sold at the auction (below) but was sold at another auction about the same time and is likely to be in Germany. E-mail john.scott(at)ksbr.co.uk [please substitute @ for (at)].
Franklin Woodcock in Leicestershire has enquired about two T-Types he used to own. The first, pictured above, was owned by him from April 1966 until December 1968. He says it was a super car that never let him down in 35,000 miles and had such ‘luxuries’ as a dipping mirror, heater and reversing light. He saw it at a classic car show in Stoneleigh in the 1990s and was delighted to learn that it was then owned by the son of the original owner in Lancashire. The DVLA search facility confirms that it still sports its original green bodywork and that it is taxed and MoT’d.
The second car was
bought as an engineless rebuild job in 1971. Purists now need to look away
because a TR2 engine, gearbox and back axle was fitted. Further modifications
included the redesign of the steering to accommodate a Morris Minor rack and
pinion and the fitting of Austin A35 low level windscreen wipers.
Franklin admits it all
sounds barbaric these days, but that was nearly 50 years ago.
TA1690 was sold to a
chap in Nottingham and the last Franklin heard of it was at a dealer’s in
Newark-on-Trent around 1995.
Dieter Wagner has been
in touch. He has sold his TC special and has acquired a 1953 TD. He bought the
car unseen – i.e. not inspected – from the US with only some pictures and a description
of the vehicle from the seller. A little risky, but after a bit of fettling Dieter
is happy with the car, apart from one aspect.
The TD has a Datsun
five speed gearbox and a 4.3 ratio diff. Whilst Dieter knew about the taller
ratio at the time of purchase, he says that in the light of driving experience,
the combination of the 5-speed with the 4.3 axle ratio is not very satisfactory
as it is ‘too long’. Whilst he can live with it for the time being, he’ll be on
the lookout for a 4.55 ratio, or maybe switch axles for one from a TF (4.875)
in the future.
Having sourced a difficult to find hardtop for the car, Dieter has been busy restoring it and fitting it to the car whilst keeping the standard hood/side screen arrangement. How he did this will have to wait for the next issue as I’ve run out of space for all the pictures he sent, but here are some photos of the finished set-up and the usual hood and side-screens.
Here’s a couple of pics of the standard arrangement:
TD/TF WORKSHOP MANUAL
Available from the T-Shop http://tshop.ttypes.org at the competitive price of 19.50 GBP plus postage.
This website uses cookies to improve your experience. We'll assume you're ok with this, but you can opt-out if you wish. Cookie settingsACCEPT
Privacy & Cookies Policy
Privacy Overview
This website uses cookies to improve your experience while you navigate through the website. Out of these cookies, the cookies that are categorized as necessary are stored on your browser as they are essential for the working of basic functionalities of the website. We also use third-party cookies that help us analyze and understand how you use this website. These cookies will be stored in your browser only with your consent. You also have the option to opt-out of these cookies. But opting out of some of these cookies may have an effect on your browsing experience.
Necessary cookies are absolutely essential for the website to function properly. This category only includes cookies that ensures basic functionalities and security features of the website. These cookies do not store any personal information.
Any cookies that may not be particularly necessary for the website to function and is used specifically to collect user personal data via analytics, ads, other embedded contents are termed as non-necessary cookies. It is mandatory to procure user consent prior to running these cookies on your website.