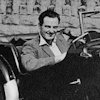
Category Archives: Issue 79 (August 2023)

Bits & Pieces

Steel gaskets (and nitrile bonded cork gaskets) for the tappet chest side plate.

This is a last call for these kits (it needs to be, as this is the last issue of TTT 2!).

At the time of writing, I have just three (3) kits left.

Cost is £14 plus £3.49 UK postage. The kits can be sent overseas for the appropriate airmail (or surface mail) rate.

If you would like a set, please send an email to jj(at)ttypes.org [Please substitute @ for (at)] and I will let you have payment options.

Reduction in price of some Regalia items

Reproduction of TF1500 sales brochure Publication No. H.54125

16 pages, plus front and back covers (shown above). Sales of the TF1250 were markedly slowing, so the TF1500 was introduced and the opportunity was taken to capitalize on Captain George Eyston’s record-breaking success at Utah, USA, where eight new International Class “F” records were set.

This is a nice reproduction and the quality is much better than the scan used here.

Price reduced from £7.50 to £4.00. UK postage is £1.15. Overseas postage is dependent on Continent.

Contact the editor at jj(at)ttypes.org [Please substitute @ for (at)] for payment options.

Reproduction of TF1250 sales brochure Publication No. H. & E. 53101

This is a fold out brochure to size 550mm (down) x 430mm (across). Price reduced from £5 to £2.50. UK postage is £1.15. Contact the editor as above.

Note:  The TF1500 and TF1250 sales brochures can be sent for £1.85 UK postage if ordered together.

Reproduction of TA/TB Parts List

Reproduction printed on coated paper. 76 pages. 

£2.50 plus £2.40 UK postage.

Contact the editor at jj(at)ttypes.org

[Please substitute @ for (at)] for payment options.

Gold Portfolio Books

A collection of interesting articles and period road tests. Two copies of TA & TC available at £4.50 each and one copy of TD & TF at £4.50. UK postage on each book is £2.50. 172 and 176 pages each book.  Both were previously being sold for £13.50. Contact the editor as above.

Practical M.G. TD
Maintenance Update & Innovation

I have one display copy of this useful little C5 sized book (contains 91 pages) Very slightly ‘dog-eared’ on bottom right-hand corner. £1 plus £1.85 UK postage. Also have three (3) new copies left at £6.50 each plus £1.85 UK postage. (Editor)

Operation Manuals (handbooks) for the TD and for the TF and TF1500

Two copies of each available at £4.50 per copy (both were previously being sold for £8.95). UK postage is £1.85. Please contact the editor.

Ed’s note: This completes the list of reductions. When they are gone, they are gone!

Now to some items that I wish to dispose of/no longer need.

Thick keyed washers for rear spring front mounting pin

For TC and probably TA and TB as well. As shown in the picture, I have five of these. I prefer to send two separate packages of two and perhaps the odd one which could serve as a pattern. These are free of charge (I have seen them advertised for £19.29 plus VAT). Just send me £2 for the postage for two and £1.50 for the postage for the odd one.

Phosphor bronze trunnions

These are ¼ inch slot new trunnions for TA and most Triple-M rear springs. Also suitable for front if ¼ inch main leaf used. Three sets of 4 available at £32 plus £3.50 p&p per set. (Note that Moss stock these for £49.50 per pair i.e. set of 2). For the keyed washers and the trunnions, contact the editor at jj(at)ttypes.org [Please substitute @ for (at)]

TF tank ends

A pair of new after-market TF tank ends. Some surface rust in places on the insides. £5 for the pair plus £5.50 postage. Contact the editor (as before).

XPAG (‘round hole’) head gaskets

Two new XPAG head gaskets (’round hole’). Suit late TD and TF/YB. Gaskets are from ‘Gaskets for Classics’. £5 each plus £3.50 postage for each.

XPAG bottom end gasket sets

Two new sets from ‘Gaskets for Classics, which include the correct section ‘rope seal’ identified by Eric Worpe and sourced by the editor. £7.50 each plus £6 postage for each.

XPAG/XPEG camshaft lock tab washer

New, still in B&G poly packet. Not the new shape, which is currently being advertised for £5.94 inclusive of VAT. Free, but please send the editor £1.50 for postage.

Brake hoses TD/TF

New, boxed, I’ve had them for a few years. £4 for the two plus £4 postage.

TA/TB/TC (and Triple-M) tab washers for front leaf spring pin

Free of charge (for two), but please send £1 for postage.

I noted that Moss are charging £8.29 for (I assume) two.

TD/TF crown wheel and pinion Crown Wheel and pinion from my TF1500. It was performing quite adequately until I had it changed for a higher ratio one from an MGA. £40 plus £10 postage. Photos on request. The ratio is standard 4.875.

Headlamp daisy rim screw

See Part number 641L on the website of The Complete Automobilist, £20.34 each, inclusive of VAT. Two available at £4 each plus £1.50 postage on each. The threaded part is not perfectly straight, but should fit ok.

Tappet chest cover plate

One available for £15 plus £4 postage.

Timing chain cover

One available for £20 plus £4 postage.

I think that’s about everything, except the kitchen sink! When they are gone, they are gone!

…….and to close……..

I’ll take the Reconditioned TC Gearbox (Exchange) for £9.15 (nine pounds fifteen shillings) £9.75.

I thought my prices were good, but I can’t compete with Bill’s!

Lost & Found

TD9712 (AFL 972)

AFL 972 has been featured before in TTT 2. This time Nick Martin contacted me about the car as it used to belong to his father. I was pleased to be able to put Nick in touch with current owners, David and Sue Barnes. Nick has sent them some period photos from the time Nick’s dad owned the car, one of which is reproduced here.

TC0678 (BAG 322)

BAG 322 was owned in the late 1960s by a young school-teacher. He paid £160 for the car which needed some work. After two new back springs, and new tyres, he left a local garage £70 lighter. The story of the car was featured in the London Evening Standard in 1972 and I would have loved to have reprinted the article and the picture, but having contacted the newspaper it seemed that there might be too many hoops to jump through, and talk of obtaining a licence sent pounds, shillings and pence flashing through my eyes.

Such a pity because the article mentioned the time when the exhaust dropped off in the City with the owner holding up the traffic whilst lying underneath to re-hitch it with the help of two plumbers, who had supplied the all-important jubilee clip. Also, when a half-shaft broke in Islington and a young man in a hearse came to his rescue – no jokes, please!

The car is now owned by John and Sally Reay who purchased it in 2004. The pic shows John with the car, minus its 1960s style chequered grill.

BAG 322 underwent some major restoration in 1990 by its previous owner, and John has continued with some running restoration works since.

TA???? (EXR 443)

This is EXR 443, thought to be a TA, with Les Belcher at the wheel in his younger days, when in the early 1950s it was his daily driver. Les is 96 and is now in a care home. Paul Albért, who visits Les, managed to find this photo.

The story goes that Les wanted to go to America where he knew job prospects in the early 1950s were better than in England. However, he needed to raise some funds to get there. The opportunity presented itself while Les was in Oxford at a cricket match. He was approached by an interested buyer for the car, but having agreed on a sale price (the sale price is lost in the mists of time) the buyer did not have all the money on him. Apparently, no problem for Les… he took all the money the chap had on him, including all the loose change in his pockets as he reckoned that this would be sufficient to get him to America.

Who was the mystery buyer? Any leads to the contact form on the website, please.

TA2404 (FNU 90)

The May issue of Enjoying MG contained a couple of paragraphs and a photo of this car. Rick Eckersley was seeking information about his father’s old TA. I don’t know if any leads were forthcoming, but it is probably worth giving it an airing under Lost & Found.

It is taxed and so must be on the road. It is XPAG’d and probably still has its Shorrock supercharger.

Any leads to the contact form on the website, please.

Editor’s Note:

This is, sadly, the last ‘Lost & Found’ in TTT 2. It has been enormously successful in tracking down ‘Lost’ cars and has ‘Found’ quite a few. I know that readers have enjoyed the feature and they particularly like the period photographs. The good news is that I am hoping to run the feature in the Octagon Bulletin and will consult with Roger Muir, the Editor, about this.

Early XPAG oil pump priming

Not all XPAG oil pumps seem to be effective at self-priming which can result in anxious moments waiting for some oil pressure to build up when first starting an engine after an oil change.

One possible cause could be the inclusion of an anti-drain back flap valve in the modern spin-on filters that are used in one type of oil filter conversion. The oil pump already struggles to draw up cold thick oil from the sump against any sort of back pressure and the flap valve adds to the difficulty.

To help overcome any self-priming problems due to back pressure, the following guidelines might help.

1, Remove spark plugs so engine can turn freely using the starter motor, without loading the crank shaft bearings.

2, Fill up the new oil canister with fresh oil; this won’t help overcome the back pressure but will reduce the time for the oil pressure to build up when the oil pump is primed.

3, Unscrew the brass plug directly above the oil pump, and to the side of the lower dynamo bracket, the hex head needs a thin wall 1/4 BSF ring spanner.

4, Spin the engine using the starter motor until a cupful of oil and air bubbles have leaked out from the oil gallery via the opening. If after about 8 seconds no oil has leaked out, go to step 5. If oil does flow out, then replace the plug and spin the engine again. If, however, oil pressure doesn’t build up, remove the plug again and go to step 5.

5, This step attempts to remove all back pressures on the pump by partially disconnecting the pipe between the pump and filter. Unscrew the banjo bolt on top of the oil filter, making sure that the banjo adaptor doesn’t twist, as this puts a strain on the copper pipe where it enters the banjo adaptor. An adjustable spanner locked onto the adaptor could be used to stop it twisting. After unscrewing the banjo bolt until it is loose, spin the engine until oil squirts out. Retighten the banjo bolt and spin the engine until oil leaks out of the brass plug opening. Replace the brass plug and spin the engine until some oil pressure is indicated. Repeat 5 if needed.

6, Replace the spark plugs and check oil pressure with engine running. 7, As the starter motor can be made to run independently of the ignition, you may wish to consider spinning the engine on the starter motor for a few seconds before turning on the ignition. This helps circulate oil before the engine “fires up”, particularly after a long engine rest period…

…………Oil filter conversions.

Some rogue cast aluminium adaptors for spin-on oil filters conversions were made many years ago. They were not cross drilled, resulting in the pumped oil entering the filter element through its central core. The filter element’s convoluted membrane is not robust if oil flows in the wrong direction, but more significantly any anti drain-back flap valve would block oil flow. Oil would continue to reach the bearings by way of the oil pump’s by-pass valve; however, the oil would be unfiltered and at a lower pressure.

Here is a photo of a rogue oil filter adaptor and the opened-up oil filter showing the flap valve which would cover the holes in the flange.

Take care choosing oil filters, filters for modern cars running on much thinner oils may not be suitable for the 20W50 oils used for XPAGs. The most common spin-on filter conversion is intended for 76mm dia. filters with a 3/4 inch x 16 UNC thread form. Some filters have an inbuilt by-pass valve and these can operate with differential pressures as low as 7 psi. A coiled spring feature at the base of the central core is probably the by-pass valve.The GFE 443 and its equivalents are intended for A series engines and seem to be a popular choice.

Eric Worpe

Ed’s note: Eric says that it’s almost impossible to find the specifications of oil filters in terms of maximum flow rate at a particular oil viscosity, capture efficiency of a particular particle size, by-pass pressure operation if valve is fitted, anti-drain back flap-valve if fitted, oil pressure drop as function of flow rate and viscosity, dia. of sealing ring and thread form. Whilst he suspects that the GFE443, intended for ‘A’ series engines running on 20W50 oil may be ok, he is unable to endorse it.

As we are discussing oil filters, I have two of type GFE102. The label reads as follows:

Oil Filter Element
with ‘O’ Ring [on oil pump]
Late TD/TF/YB

Free, but postage of £4.00 for sending the two would be appreciated.
jj(at)ttypes.org [Please substitute @ for (at)].

The Dick Jacobs MG TD Special (SHK 7)

The June Issue of TTT 2 featured an article by Matt Sanders on the Dick Jacobs TA Special (CS 7695). Mention was made, and a picture included, of the successor to the TA, a TD-based Special (SHK 7). This attracted the attention of reader, Rob Dunsterville, from New South Wales, who when living in England, wrote an article on SHK 7 which was published in The Classic MG Yearbook 1974. This was edited by the late Dick Knudson, co-founder of the New England MG T Register in USA. To quote Rob from a recent email to me, “I was greatly assisted by Dick Jacobs himself and he corrected my draft and approved the final story so the details are authentic.” 

The article was entitled ‘SPECIAL, SPECIAL’ and with Rob’s permission (as the author) I have reproduced it here. I need to point out that whilst the words have been faithfully reproduced, the layout is different, due in part to print size, font, and positioning of some photos between the original article, as published, and TTT 2. Also, the pic of SHK 7 with rigged up rough luggage rack is different to the one originally published. The pic of the front suspension is ‘landscape’ rather than ‘portrait’.

SPECIAL
SPECIAL

By

Rob Dunsterville

To some, the ownership of an MG special is more exciting than owning a concours premier class winner. To own one that was well known in its competitive heyday, being driven to and from every event, must be going one step further. Perhaps the ultimate is the T Type special registered SHK 7. This is the car built up by Dick Jacobs whose career with MG’s is legend.

Tim O’Rorke is the lucky man with this car now in his London garage. In fact, it could be said that he is doubly lucky as this is his second ownership. He sold SHK 7, after worthy service, when his demands of motoring were beyond its capabilities.

He regained it when, by chance, he was browsing through a copy of Autosport early in 1973 and saw the familiar registration number in the sale column. The sirens called and with nostalgic memories flashing through his mind he set off in the successful pursuit of his old amour.

The Beginning

Dick Jacobs had been driving TC’s and the earliest TD’s for the MG Factory in races for production sports cars. From additional experience with his TA/TC (1937 chassis) based special, he could see in the TD the basis for a more successful car and set about building just that. A brand new TD chassis   had its rear end cut off and the rear end was ingeniously relocated using Panhard rods and coil springs, Dick says, “The production of this chassis was entirely due to the more than close cooperation of Syd Enever, the chief development engineer at Abingdon. The front suspension was modified to YB specification which was smaller and stiffer springs giving less unsprung weight”.

Into this rolling chassis he installed a TC block which had liners to reduce the swept volume. A polished and balanced crankshaft with special pistons all added up to 1,087cc (which is a familiar size coincidentally, to those who know anything about K3’s). The basic idea behind this reduction was that Dick could fit a supercharger and yet remain in the under 1500cc class. A standard XPAG engine of 1250cc when blown would be placed in the next class up to its disadvantage.

Early MG’s had superchargers fitted between the dumb irons and driven by the crankshaft. Later, the style changed and by fitting an extra pulley behind the starting handle dog nut, a blower could be mounted under the bonnet with no modification to the bodywork. However, Dick had a small problem. He wanted to blow the engine but a supercharger would not fit in the conventional position, as he had cleverly designed the body to be much too narrow to reduce drag.

His engineering ability soon overcame this and he moved the dynamo to the off side and put the puffer, a Marshall with a 1 ½” SU carburetter on the near side with the inlet pipe making a journey around the front of the head and into the inlet manifold in its usual place. This repositioning also allowed plenty of space for a four branch exhaust system, enhancing the discharge of exhaust gases. The re-routing of the plumbing allowed no room for a fan and was omitted, but an electric one is now on the car to ease traffic overheating problems.  Dick built the body from small diameter steel tubes and light alloy panels. Fibreglass has since been used for the bonnet, rear end inspection hatch and nosepiece. The shape was devised as he put it “from two photographs – one was the rear of a Frazer Nash and the other the front of an HWM, both very successful cars at that time.”

The cockpit and simple dash (Ian Nowell photos)

Head on view shows narrowness of design & cooling fan

Much of the car was lightened using the old technique of drilling everything in sight, including the accelerator pedal.

The mechanical modifications proved amazingly satisfactory and the car still retains the same crankshaft. Production MG’s were particularly competent in the road holding and handling department. This special, incorporating a mixed bag of suspension equipment was a different kettle of fish. Again, Dick’s experience and competition knowledge was used and development work soon sorted out the problems, so that the car now not only holds the road in a surprising manner, but handles superbly with the lightest of touches. Its difficult to realize that there was a problem at all, as it feels so good in comparison with a normal T Type.

Dick confesses that the car never won him any races, but he obtained overwhelming pleasure from its reliability. He was rewarded by being in the first three every time out, except in the Manx Cup Race, where he admits to over-revving the engine, which caused the blower belt to come off. He reckons that his most thrilling race was for the Ulster Trophy at Dundrod where he came in third in the 1300cc scratch race after removing the wings and head lights.

 He remarks that the car was a pretty and pleasing shape by the standards of the early fifties and this is borne out by the number of fresh offers he received for the car at every meeting. He finally accepted one from “ a young man who had made a lot of money producing films.” Disappointingly, the registration book has been lost between the periods of Tim’s ownership, and he cannot remember the name of the second owner.

 Tim bought the car from a doctor, who, he thinks, was the third owner. Apparently, he had had little joy with it as a star performer and sold it after two years. Tim soon found out the reason when he returned it to Dick’s Mill Garage in East London for an engine overhaul.

Dick had not seen or heard of the car for about eight  years  and  immediately  spotted  that  the

supercharger had been removed. When it was stripped down the lack of performance was abundantly clear. During an earlier overhaul someone had fitted the wrong pistons, not realizing that he was defeating Dick’s original concept. This gave a compression ratio of about 4:1 instead of about 8.0. With the engine back in shape, but still sans compresseur, Tim set off from Mill Garage almost directly for the Continent after quickly rigging up a rough luggage rack, as there is no space behind the seats. Even the passenger side of the cockpit is cramped with the battery half sunk into a well in the floor.

Tim with SHK 7 with rigged up rough luggage rack – note the drilled wheels.

“SHK 7 was as happy on the not-so-good Spanish roads as anywhere”, says Tim, “and she was quite capable of the magic ton with reassuring stability, even if the ride was a trifle hard at times.” Tim’s first competitive event in the car could have been a disaster. He had entered a sprint organized by the Cambridge University Automobile Club on one of the old airfields in East Anglia and had put fastest time in practice for his class. During the lunch break his eye rested on the TD disc wheels which had been heavily drilled full of holes for lightness. Tim spied hairline cracks joining each hole with the next one and that was enough to cause him to withdraw and drive slowly home.

The tyres at this stage were in need of replacement as worn Dunlop R3s are unstable in wet conditions.

All basic XPAG with long route for the inlet pipe from supercharger to manifold

Tim arranged for a garage to renew both the wheels and the tyres and was determined to have another go against the clock – his competitive spirit undaunted. On the road to the garage, he thought he could smell petrol leaking. He reduced speed and turned his head to see if the leak was from the tank. Suddenly the car in front stopped but Tim was unable to follow suit. An inevitable collision occurred and frighteningly, flames shot into the air from under the bonnet. Tim managed to put out the fire but the car was in no shape to go racing.

After two years of happy ownership, he decided it was time for another car and turned his attention to TR’s and the like. During those two years SHK 7 had served him well as an everyday car and his only one at that. It was only equipped with a primitive windscreen, hood and side curtains and these were fitted after Dick sold the car, but seldom used in the best MG tradition.

The car passed to a man called Clayton and then again to Jamie Granger. Under his direction it added more competitive miles and some modifications were carried out by Atlas Motors of Isleworth in Middlesex. These included fitting of an anti-roll bar, MGA drum brakes, and again a supercharger, but this time a Shorrock. SHK 7 then had a long spell in a private garage while Jamie was in America.

When he returned a couple of years ago, he decided to sell and this is where Tim reappears on the scene. During his first ownership it was painted blue but when he saw it again it was British Racing Green with white circles as it still is.

Tim returned the car to Atlas for a thorough check over for registration purposes and peace of mind and used it during the summer of 1973. During the winter he tidied up a few bits and pieces ready for the finer weather this year but it was not to be. Tim has had many commitments away from London and has been unable to give it more than a regular check over. SHK 7 is eligible for membership in the Historic Sports Car Club and Tim hopes to reverse this summer’s lack of activity next season in both MGCC and HSCC events.

Thus, you can see that Tim is not a man to wrap this irreplaceable car in cotton wool. Far from it as his MG experiences will bear out. He started by illegally keeping a M type at school which he tinkered with during the term time. When he got his license, he was straight off to the Continent in his holidays. He took a good stock of big end bearings and that’s about all. It was easier to change those beside the road than fix the temperamental oil pump. However, he was stumped with a broken crankshaft in Switzerland.

Rear end with suspension modifications

His next MG was a blue PB which also became a European tourer and on one trip to France with the late Piers Courage, they took it in turns to frighten each other coming down the Alpine passes at about 60mph using only the handbrake as the foot brake had seized. He also had a couple of J2’s, one he thinks had a F… engine which was not so frowned upon in the early sixties. So, you can see that SHK 7 is in octagonal hands which will soon be gripping the steering wheel with all the tenseness that makes motor sport so exciting, or in a relaxed manner out some summer evening. As with all MG’s it will be most exciting to see a car such as this in action again.

Traditional TD/Y suspension with adaptations and mounting plate for anti-roll bar.

Editor’s note

I had hoped to reproduce a photograph of Dick Jacobs racing SHK 7 at Silverstone. As it was a photograph which appeared in Motor Sport publication, I asked permission to reproduce it, saying that I was willing to pay a reasonable fee. Unfortunately, after an initial acknowledgement, and then no further contact from the publication I emailed them again, but sadly, nothing.

The one photograph I have appears to be a photostat of a photostat and would look awful.

Rob Dunsterville, the author of this fine article, is keen to learn the current whereabouts of SHK 7. Any ‘leads’ to the editor, please. jj(at)ttypes.org [Please substitute @ for (at)].

T-Types and reliability

by Laurent Castel

Due to my job, I’m a bit mad about reliability. For mathematics, reliability is the probability of success of a mission. For classic car tourer, it is your confidence level about your car.

You can find several publications about how to improve the drivability (engine power, lighting, indicators, brakes…), car comfort (waterproofness, seats, heater…). The purpose of my present writing is to gather tips and tricks that make an MG reliable. Descriptions of these improvements are often already described and I will just make a reference. A trusty car is a car that you can drive daily but also enjoy when you put the suitcase in for a peaceful journey.

First asset for a reliable car is simplicity. The MG TD is a good candidate.

However, our cars are old with a high mileage on the clock – severe drawback for reliability! We all know it is a common task for us to change the tyres, the brake linings, the bulbs, or the points; less considered is the wear out of electric or rubber parts.

So, I first recommend to check or change the fuel hoses, the brake hoses, the various suspension rubber bushings, the fan belt, the dynamo, and starter motor brushes. All these are cheap parts and could spoil your planned holiday if they fail.

Almost impossible to check for cracks or voltage insulation, cheap also, you should replace all the high tension leads around the distributor.

A bit more expensive is to fit a new water pump if you fear a sudden leak. And why not fit an improved six vane water pump? See TTT 2 N°32 p23 – tests from Geoffrey M. Baker show a 30% coolant flow improvement.

Ignition is one of the fear of mechanics. However, it is very reliable even, (or especially?) keeping with the original Kettering system.

Why fit a sports coil, commercial appellation for high voltage coil? Reliability is for tourers, not for racers. So, keep on with a good old low voltage one. It will generate enough voltage for any high compression engine with clean plugs up to 5500 RPM. And it will prevent accidental arcing on the leads, the distributor cap, or the rotor arm.

In a similar way, change the rotor arm for a high voltage one, with no rivet: they are often red. GRA2101HQ from Moss or Distributor doctor. This is called the strength stress principle. Reduced stress, increased strength: more reliable. Coil, or more precisely the cooling oil inside is more prone to self-arcing at high temperature. So, make sure the coil thermal flux is efficiently conducted to the firewall. It is mainly conduction cooled. Attach the coil to the firewall with a wide bracket. The coil itself is convection cooled by the inside coolant. So, it is better to attach the bracket to the highest part of the coil. See picture.

I even smear a layer of thermal compound between coil and bracket and between bracket and firewall. Sold on eBay for powerful microprocessors!

Whilst on the ignition system, many of us have experienced failures with new condensers. These devices are often very poorly manufactured by an unknown guy somewhere in the far east.

Nowadays, special capacitors (the electronic name for condensers) are available for high voltage pulse applications. These are common in power supplies of many domestic appliances. Recommendation is to fit one of these. Forget about car part manufacturers for condensers. Chose the best capacitor manufacturer for electronic designs: Vishay (space domain manufacturer): MKP1839 or MKP1845 series are designed for AC and pulse applications. This is exactly what we need. Refer to TTT 2 N° 31 p4. Eric Worpe describes how to adapt this part inside the distributor. Such a condenser is installed on two of my cars.  4000 Miles on them.

Electricity is often neglected by mechanics. A good wiring is the key to reliability. Splice is banned.  Add a short ground wire to chassis for any current sink (headlights, horns, fuel pump).  Insert shake proof washer on the terminal to penetrate the metal. See picture.

For hot wires (the ones carrying voltage) fit a rubber boot on the terminal. Many of us experienced the sudden engine stop due to the tacho gear box that rotates down to the distributor terminal. Fitting a rubber boot on it prevents a possible short circuit to ground.

See pictures.

Horns draw lots of current. It may damage your expensive Lucas push button on dashboard. Insert a relay. See TTT 2 N°30, p15 from myself.

In TTT 2 N°22 p16, Peter Cole explains how to protect the contacts of the original fuel pump by fitting a Transil*. This reduces the electric arcing across contacts and thus decreases wear out.

Install a redundant fuel pump as in aircraft! The inner design of the Lucas fuel pump allows to fit a secondary pump in series on the fuel pipe. A modern one can then be hidden just below the tank. A simple switch can activate the second pump without even stopping the car in case of failure of the Lucas one.

I have a Facet cube type pump which also allows fuel to freely flow in it when not powered. Don’t forget to test the redundant pump from time to time.

If you are about to remove the tank, a good thing is to coat it. It then is less prone to rust due to ethanol blends. It also copes with pin size holes and freezes all particles in it. You can get the resin material from several dealers. Restom, well known French manufacturer, makes its own kit including de-rust, cleaner and resin. A real best seller here. I’ve never heard any complaint about it.

Whilst at the tank, the sender unit is a well known leaky place. If it is leaking, replace the original cork gasket.

Ed’s note: The Octagon Car Club sells a gasket set (2 gaskets) in ethanol resistant rubber (you need to be a member to buy spares from the Club).

If it is not leaking, leave well alone (“if it ain’t broke, don’t fix it!”).

Many people claim to install an inline fuel filter after the pump. In case the filter is totally clogged there would be a risk of pump damage if it is installed before the pump. But in case the filter becomes totally clogged you would have certainly experienced problems before! The engine would stop well before the pump overheats. So, I personally recommend to install it before the pump. Just at the output of the tank. You don’t want any particle in your pump as well.

There is absolutely no risk for the pump if you check the filter regularly (once a year). They are transparent. Change it every 5000 Miles. It is really cheap.

About brakes. Leaky cylinders? Stuck piston? Change the fluid for silicon based fluid. This laborious job is described everywhere. It really is worth it. You will just forget about brake maintenance for at least a decade. Protect the bleed nipples with rubber caps. Sold on eBay for a few pounds. Do the same for grease Zerk.

And of course, don’t forget the regular maintenance as described in the workshop manual. Have your checklist ready at the beginning of the season. Many discussions on forums about checklists.

Your T-Type is now at the highest level of reliability (for a 70 year-old grandma). However, carry a minimum of spare parts. Just for peace of mind!

The Distributor Doctor (Martin Jay): https://www.distributordoctor.com

MG Octagon Car Club: http://www.mgoctagoncarclub.com/Parts/parts.html

Restom: https://www.restom.net/fr

*Note: Transils are available from the MG Octagon Car Club.

GoF Here We Come!

“Where are you going?” asked the US Border Guard.

“We’re going to Buellton California”, I replied.

“Who’s we?” he asked.

“Me and the two guys in the lane behind you”, I replied.  He turned around and looked at Gary and Kerry in the 1955 MG TF in the lane behind him.

“Carry on” he said, and off we went for a quick pit stop in Blaine, before hammering down the I5 to the exit to Fairhaven.

It was 6:30 am on 23 June 2022 at the Pacific Truck Crossing. I’d spent the night at Kerry’s house in Fort Langley in order to save myself the extra hour it would’ve taken me to travel from West Vancouver to meet the team in Aldergrove.  As it was, today was going to be the Longest Day. Not only did we have a distance of 350 miles to travel, but today also included a ferry ride.  Our destination was Tillamook WA, on route to Buellton CA for the 50th GoF West meeting.

At the Shell station, just off the exit to Fairhaven, we met the rest of the gang.  Warren and Kerri Shott and their blue ‘53 MG TD, Alan Donaldson in his red ‘50 MG TD. Unfortunately, Kim was unable to bring ‘Scarlet’, his red ‘50 MG TD, since he had some concerns regarding the engine’s health, so he brought his Hyundai. Kim is the UnClub’s tail-end Charlie, since he always brings up the rear of any convoy.  He’s the guy who picks up any pieces that may fall off the cars in front of him. Kim knows everything there is to know about the T -Series cars and a very valuable asset to the team. It turned out to be fortuitous that he brought his Hyundai and had the foresight to include a tow-bar.

After filling up at the Shell station we decided, since we had enough time to get the 10:30 ferry from Coupeville to Port Townsend, we could make the trip via the scenic Chuckanut Drive rather than going down the I5.  And so, ‘The Magnificent Seven’ set off.

From Chuckanut Drive we merged onto Hwy11 and hit traffic.  I got separated from the rest of the crew behind a large truck and other vehicles and as we entered the roundabout to turn onto Highway 20, horror of horrors, I took the wrong turn off and found myself on a divided highway heading to Anacortes with no way to turn around until I reached Fidalgo Bay, at which point I was about half way to Anacortes. After doing a U-turn back onto Highway 20, it was pedal to the metal down to the roundabout and back on towards Coupeville.  Now I was far behind the crew.  Whether or not I would  make it in time for the ferry was my main concern. ‘Chillipepper’ didn’t let me down and we made it to the ferry terminal with time to spare. 

From Port Townsend we travel down the 101 along the scenic Hood Canal, with an obligatory pit stop for ice cream at Hoodsport.

Hoodsport pit stop for ice cream

Then it was on to Tillamook via Astoria. We rolled into Tillamook about 6:00 pm after a long 12-hour day.

Friday 24th of June. Today’s destination is Gold Beach Oregon, a mere 245 miles away. We proceeded down the scenic Highway 101 with a variety of weather varying from warm August sunshine to cold and misty.

Left: Arch Cape, Oregon Right: Humbug Mountain

Lincoln City, Oregon

Entering Coos Bay with Greg and Alan in front of me I noticed that the Shotts and Kim were not behind me. I signal Greg to stop.  We waited quite a while and when they didn’t appear I managed to call Kim, who informed me that the Shotts’ TD had experienced a catastrophic failure and he was unable to get it started.  He suggested that we carry on to Gold River and they would catch up with us.

Late in the afternoon they arrived at the motel in Gold River in Kim’s car. Kim informed us that after having to make adjustments at a mechanical shop to the tow bar in order for it to fit the TD, they had towed the car into Coos Bay to find a place to leave it. While trying to arrange to leave it at a Toyota dealership, a stranger pulled up and offered to let them leave the car at his house.  They took him up on his offer.

“Aren’t you concerned about leaving the car with a stranger”? I asked. “Say, when you get back there, the car is gone, and he just denies ever having seen you”?

Something to worry about for the next 8 days.

Heading to Ukiah California the next day along Highway 101, we detoured through the spectacular Avenue of the Giants and the Humboldt Redwoods State Park.  Humbolt Redwoods State Park.

Humbolt Redwoods State Park

Days 4 and 5 we continued along Highway 101 through Monterey, and Big Sur to the Golden Gate Bridge then on to the Old Pacific Highway (Hwy 1) and finally arriving in very sunny Buellton California.

Three Cars at Big Sur

The GoF agenda included displays of arts crafts photos, and models. Also featured were technical sessions, a funkhana, and the field car display [PICTURE River View Park Field Meet 1 & River View Park Field Meet 3] and a rallye/tour, receptions, and buffets dinners.

River View Park Field Meet

Three and a half miles from Buellton lies the Danish town of Solvang – Danish architecture, Danish bakeries, and a bust of Hans Christian Andersen in the town park.  No visit to Solvang would be complete without a sample of Danish pastry.

Danish and Coffee Solvang

Gary, who had attended many GoF meetings, suggested that we enter the rallye/tour with me as driver and he as navigator. Gary had a plan. After picking up our tour itinerary and the clue sheets we set off. However, I noticed that Gary wasn’t pay particular attention to identifying all the clues on the route, or worrying about our timing. We just enjoyed the drive along the scenic winding country roads. At one point we missed a turn and proceeded on our own tour, linking up with the itinerary further along.

Awards night and the Magnificent Seven from BC cleaned up. Alan won the second place in the Car Display TD Class, Warren and Kerri won the Hard Luck award. The group won the ‘Cumulated Highest Mileage’ for any MG club, with a total of 4345 miles. I won the individual long-distance award for having travelled 1474 miles from West Vancouver to Buellton and Gary and I won the rallye award for ‘Dead Last, But Finished’. That was Gary’s plan.

The Magnificent 7 Winners

After four glorious days in Buellton, we headed home on July 1. On the way to Monterey, California we detoured through the scenic suburb of Pebble Beach. The second day we travelled to Ukiah and on the third day to Gold Beach.

On the fourth day, heading toward Tillamook, Gary’s TF experienced a water pump gasket failure.

Roadside Repair Water pump gasket

Once again thank goodness for Kim, his Hyundai and the tow bar. After a brief roadside inspection, it was determined that we’d have to tow the TF to North Bend, where Warren and Kerri had left their TD. Much to our relief, there was the TD in the Good Samaritan‘s driveway. The Good Samaritan was a gentleman named Harold who extended us great hospitality while the TF water pump gasket was being replaced.

After five hours of repair work, we were back on the road to Tillamook.

The next day we headed home. But Gary’s woes were not over. Near Shelton WA, his TF got a flat tire! After a roadside tire change, we were on our way again. Three T-Series on the road and one behind a tow bar. Back up the 101 to Port Townsend and then the ferry across to Whidbey Island onto I20 over Deception Pass then the I5 at Burlington. At Bellingham, Gary Kerry, Kim and the Shotts heading off to the Sumas crossing, I peeled off to the Pacific Truck crossing, and Alan continued on to the Peace Arch crossing. Parting Was Such Sweet Sorrow. After another long day, I arrived home at around 10 PM.

Tony Cohen

DBL 54 – TERRY MIDWOOD

BOTH BORN IN 1946

BOTH STILL GOING IN 2023

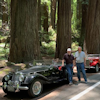
A LONG JOURNEY RECOUNTED

It was September 1962 and I had left school to join the real world! Thanks to a family friend, I was able to secure a place on a 5-year Engineering Apprenticeship with Ferranti Ltd at Hollinwood, Lancashire. For the first 6 months we were in the Training School being taught how to file, saw, and use Lathes, Milling and Shaping machines and then to use these skills to make a complete set of Engineers tools, including Die and Tap holders, Calipers, Gauges and even a Junior Hacksaw. These items are still in my study at home.

The next 2 years were spent working in each of the eight manufacturing departments of the High Voltage and Power Transformer Division and earning our first pay packet, which enabled us to become independent to enjoy our free time playing cricket and rugby and at weekends, hiking and climbing, as well as visits to the local dance halls and public houses.

It was during this free time that I worked with and met two of my still best friends, one of whom owned a 1953 MG TD, but with a 1500cc engine from an MGA. Enthused by this sports car and with a little help from my parents and grandparents, I now had the means to start looking for an M.G.

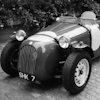
The search began and by the 31st January 1965 I put a £10 deposit on a 1946 MG TC in Clipper Blue from Archway Engineering in Manchester. On the 8th February 1965 I paid a further £40 and my journey began. The car was used as my daily transport to work, but more importantly was the freedom to travel around the UK in my spare time. Many epic journeys were undertaken; sailing holidays in Salcombe, coastal climbing near St Ives, numerous visits to the Lake District, including a few journeys over Hardknott Pass. Also, two annual overnight drives down to the Earls Court Motor Show.

As they say, all the best plans are often not achieved and a promotion at work led to my going to Canada to work at Ferranti-Packard and Ontario Hydro. On my return after 9 months a new job as Overseas Sales Manager was taken up and my girlfriend Ann agreed to marry me. This was despite memories of an epic journey in DBL 54 over the Derbyshire moors at night in the pouring rain, where she had to hold the passenger door closed when going over bumps, and to keep tightening the hood screws to the windscreen, finally having to manually operate the wipers when the motor packed up.

All this early motoring came to an end in August 1971 when the car was gracefully retired into my father’s garage in serious need of some body work and with a plan to have the engine taken out to try and sort out why the car was not as powerful as another friend’s bog-standard TC.

DBL 54 in semi-retirement

Fast forward to October 2007 and the condition of my father’s garage deteriorated, forcing me to remove the TC and bring it up to our double garage at Littleborough.2008 saw the commencement of a very slow strip down of the TC and it soon became obvious that a bigger place was needed to store all the bits, so a new shed was built. However, for the next 10 years I was employed to run a small Cable manufacturing company, which provided more funds to feed the TC rebuild. Progress only really started in the middle of  2019.

The first order was to Andrew Turner for the refurbishment of carburetters, and which produced the first surprise of the project in that the two carb bodies were of different lengths. Fortunately, Andrew was able to find a matching pair. The carburetters, as bought, never had any manifold or filter canister fitted. A new filter system is yet to be decided.Next up were the shock absorbers which I entrusted to Raj Patel to recondition. I also organised for a complete rebuild of the original radiator.

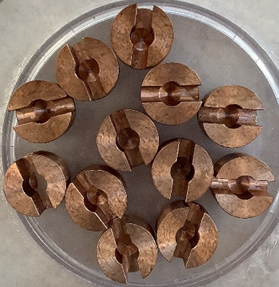
It was at this stage that I carried out a more detailed look at the engine and gearbox to assess what would be involved in its restoration. I started with the original Guarantee plate on the battery box, which gave the original car number TC/0552 and engine number XPAG 1340. TC/0552 agreed with the stamping on the front nearside chassis. However, the details on the Buff registration book, which was a continuation book, recorded an engine number of XPAG B 66320 with a 1344cc capacity?? The cylinder head was the correct 22952 so that was encouraging.Ed’s note: This would have been a replacement engine and bored out to +100 thou.

I then looked at the engine block to check its casting details, which were MM in a Diamond and the 7A8 (Jan 7 1948). Finally, I cleaned up the circular disc on the engine block, which was a Morris Motors Limited Engine Branch no. 77037 and an inner disc showing Type XPJM! which I understand had an original 1140cc capacity. This does then perhaps explain why my TC, as bought, was much slower than my friend’s TC. The gearbox was stamped XG782 which I understand was a standard XPAG.Ed’s note: This engine would probably have been bored to 1250cc.

Fortunately, I was able to sell both the engine and gearbox and subsequently placed an order with Ron Ward for a replacement. Ron lives just 3 miles from me and I continue to have regular discussions on all things MG TCs and life in general. Subsequently, I placed an order with Hi-Gear for a new 5-speed gearbox.

Ed’s note: Terry lives in East Lancashire, on the border with West Yorkshire – Ron lives in West Yorkshire, on the border with East Lancashire – 3 miles apart.

Above: The XPJM engine which came with the car. Below: Two ‘shots’ of the XPAG engine (minus air filtration) now fitted.

At the beginning of 2020 the next major decisions involved the restoration of the tub and all other metal components and chassis. Early pictures of my attempts to repair the rear wings and running boards and a driver’s side panel showed my lack of skill in this area and painting was a complete no go for my capabilities. Carl at Moss suggested I contact Steve a SH Restorations in Cross Hills, which I did and I asked him to restore the front wings, valance, petrol tank, doors, bonnet, scuttle, and fire wall and inspect the tub, metal, and wood, and quote me for checking the chassis alignment and condition prior blasting and coating.

On inspection, the tub was in need of all the metal panels, including door skins, and only a few of the wooden sections were useable. So, I did a costing using catalogue prices for the replacement wood and metal parts to make the tub serviceable. In the meantime, SRH heard that Hutsons had a near complete tub, the order for which had just been cancelled, and I bought this at a good price and  sold the old tub for someone to use as a basis for restoration. On the brighter side, SRH were able to restore all the original metal parts, except the rear wings and running boards, which were bought new from NTG.

The chassis was found to be in very good condition and the tolerance, as measured from the flat front chassis to the front cross-member, was deemed to be good. It was then media shot blasted and finally coated in satin black.

The crown wheel and pinion condition was checked by my local specialist Garage and replaced into the housing, before the axle was cleaned and painted in satin black.

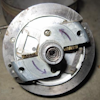
The return of the chassis in Feb 2020 allowed me to start the process of building up the rolling chassis, starting with the splitting and greasing between layers of the springs and then re-assembly – a messy job. This was followed by Raj Patel’s dampers. Next came the braking system with new brass body master cylinder, new brake lines, wheel cylinders and shoes. Then the handbrake assembly including new cables, pawl and ratchet parts were installed.

The externally refurbished brake drums were given an internal sensitive surface clean pending the return of the front axle, so I could do an individual bedding in on each drum of the new brake shoes.

The same cleaning and painting process was applied to the front axle before being taken down to Eric Worpe for him to replace the axle spindles (from Bob Grunau), kingpins and a full axle inspection. Eric made a very suitable wooden box so I could have the axle shipped back to me, to enable me to continue to replace the unit onto the chassis.  Eric also advised me to use taper roller bearings on the front axle and sealed units on the rear axle. (Supplied by Mad Metrics).

Finally, the Half shafts were Inspected for wear. I knew the offside was good as I had replaced it and its oil return bush before I laid the car up in the early seventies. On checking the nearside I decided to replace the bearing and half shaft just in case.

While I had good access to the chassis, I did a first install of the new wiring harness, renewed both engine and gearbox mounts and the recently returned radiator, including the repainted stay bars, and checked the front spring pin condition.

The silencer and rear section of the exhaust were fitted, as were both front wing stays and the bulkhead support brackets. This meant that I now had a moveable rolling chassis with brakes, original Brooklands steering wheel, column and box all connected and original wheels and tyres, ready for the next fitting of engine and body. Good timing I thought!

July 2020 saw me shift attention to my body, having a few new parts (namely a new Aortic Valve and a re-enforced Aorta). Covid had been delaying this operation since January but the hospital found a slot for me at the end of the month. I was up and about after the fifth day of the operation, and home on the 7th day. Talk about fast-track planning, but Covid circumstances prevailed.

So, with the help of my very patient wife, recovery began. However, and as you can imagine, the next 6 months or so meant light duties. I therefore set about organising more orders for new or restored electrical items, dashboard from Andrew Denton, windscreen polishing to remove scratches, restoration of starter motor, regulator, and an exchange dynamo with taco connection from Chris Wallis. All the original chrome parts for re-chroming (except the radiator shell, which I would be sending to Peter at All Metal Polishing).

It was now Jan 2021 and it became obvious that anything other than light work on the car was not recommended, so I decided to ask Steve at SHR if he would now collect the new engine from Ron Ward and fit it, together with the new gearbox and prop shaft. Then as originally specified and agreed, to complete the first fix of the tub and body parts to ensure a good fit. Afterwards, complete the painting of all the body parts and do a final fit of the tub, petrol tank, rear wings, running boards, scuttle/firewall and floorboards. This to be followed by a second fit of the front wings, leaving only the front valance and separate bonnet sections painted for me to assemble, once the restored radiator shell was repaired and chromed.

Steve understood my circumstances and was agreeable to this extra work related to the fitting of the new engine and gearbox. He duly finished the work and delivered the complete car back to me at the end of April 2021.

It was now all down to me to complete the project with a deadline of May 2022 when I had booked a slot with A.S. Pickering to install the interior, including the restored original seating, carpets, new hood and side screens and a full tonneau, again using the restored original hood frame and side screens. I had already had the original brass bodied SU Fuel pump restored by Peter Cole, choke and slow running and starter cables restored by JJ Cables and as mentioned earlier, I had the radiator shell repaired and re-chromed by Peter at All Metal Polishing in Hull and what a cracking job he did.

Steve Baker helped me to procure the set of 5 new 19inch MWS wheels, complete with Blockley tyres, as well as finding me a restored dual oil pressure/water temp gauge.

I decided to do a loose fit connection of the hoses and clips, also leaving the final tightening of the radiator securing nuts to help when I was installing the restored radiator shell. I next fitted the dynamo and fan belt, SU pump, ignition coil, distributor, regulator, starter motor and battery and their wire connections. The tidy fitting of all wires into the regulator took a couple of attempts and now looks good. Sticking with the electrics, I next finished the installation of the wiring to the front lighting, horn, and spotlight, then up the front wing braces and similarly to the rear lighting and petrol tank float unit and separate indicator lamps. All the lighting units were individually earthed in addition to their earth in the main harness wiring. The new petrol line had a first fit install whilst I still had the rolling chassis and now could fashion both front and rear connections to the pump and tank.

Finally, I fitted the front wings to the running boards and on to the wing braces, which enabled me to run the wires through the headlamp brackets. At this stage I finally fitted the radiator and shell together with the lamp brackets and stay bars to the bulkhead support bracket and left these loose until I got around to assembling the bonnet, which proved quite easy. By lots of ‘give and take’ I found an acceptable fitting, followed by fitting the front valance with some metal cutting of the valance to suit the position it was going into. The bonnet used its original catches and once I had discovered that the rear rubber corner pads had to fit in between the wing and body the catches worked first time. Not forgetting to tighten up the radiator hose clips to the engine.

At this point I had almost forgotten about the difficulty of putting the front section of the exhaust on and whilst I had to loosen both silencer and remove the tail section, I had memories of doing this way back when I had to fit a new front section.

Sticking to the mechanical work, I had left the re-assembly of the windscreen to nearly the end, as this was quite a challenge, really requiring more than one pair of hands, some very fine cable wires and a lot of Vaseline and a determination not give in.

Speaking of which I omitted to mention that I had a little problem with some newly made track rod and the tie-bars which had dodgy threads, so they were rejected and I settled for the original set and fitted new tie and drag rod ends. I also retained the original steering box with new shims. As my first drive in the car just after getting its MOT in Dec 22 the loose steering wheel approach came flooding back and convinced me to stick with the original setup.

As it worked out, the last area for attention was the dashboard, both relating to the fixed wiring layout (which does now seem to be a little busier than the old one I pulled out, particularly as I was not able to have the two bulb holders soldered to the back of the chrome panel so had to screw them to the dashboard) and I found that the new dash board harness was a little short of wire lengths, particularly earth wires. The other problem I had, seemed to relate to the slightly thicker harness wires and smaller diameter holes into which multiple wires had to go into, particularly the socket set accessory plugs. The wire sizes and numbers going in to a 9 post Regulator made the job of fitting quite a few more wires more difficult and to look neat.

The veneered dashboard supplied by Andrew Denton required very little changing and its upper curve was near perfect to match the Hutsons inner dashboard section. This was later to prove very helpful as Pickerings requested that I had to fit the leather beading onto the top and rear of the dashboard; comments so far, say it looks good.

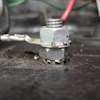
The final connecting of the main harness to the dashboard was carried out by the G clamp method and this proved workable for 95% of the harness wiring. However, the red four main headlamp and rear stop and tail lamps had to be twinned to form only two wires to facilitate connection into the ignition terminal. Care was required to feed the bundle of wires back under the scuttle whilst ensuring the dashboard fitted snugly and then tidying them up and securing them, where appropriate, under the scuttle. I had earlier fitted a Lucas DB10 Flasher/Relay unit, but I could not get this to work properly, so I took off the wires required for the indicators and did a straight connection with a standard flasher unit and switch which all seems to work ok.

It was at this point that I then fitted the assembled windscreen into position and was thankful that SHR had drilled the holes into the scuttle and test fitted the cowl brackets, with the result that it fitted perfectly and even the wiper motor worked. (However, this only lasted until one of my trial runs with the car saw the motor expire.) When switched on, fortunately, all the ancillary bits worked.

Being the first item restored, the carburettors were fitted to the engine almost as soon as I got the car back from SHR. However, the next job was to finally connect the 3 dashboard control wires onto the carburettors and linkages. Prior to this I had spent more hours trying to get the timing marks on the engine pulley and distributor set to the correct  position. I was then able to put some petrol into the tank and spend many an hour trying to get them balanced and the engine running evenly and with the mixture and plug colour somewhere near to ok. Fortunately, and whilst not perfect, the car seemed to want to jump into life when started. As a backup, I had pre-arranged to book the car into my local Garage and MOT station for them to give it a full mechanical and electrical checkup and alignment of the headlamps and finally an MOT.

The owner has a PA and services a number of customers who go racing each weekend.

The end of May arrived with undue timing but the car was booked into A S Pickerings in Bradford to have the interior and original seats recovered, new carpets installed and a new hood, side-screens and a full tonneau cover fitted. As is usual when you have a wife and two daughters, they had already instructed me to have the car painted in Jaguar Indigo and now this needed the interior to be French grey leather, with dark blue carpet, however I got to choose the black hood, side screens. and tonneau. I must admit, it does look wonderful.

Above: French Grey upholstery with dark blue carpet in DBL 54. Below: Jaguar indigo paint finish.

The car left Pickerings in early October 2022 and was delivered to the local Garage. Unfortunately, their auto electrician identified that the PLC6 was actually sparking, so a replacement was ordered and substituted. Otherwise, the car was MOT’d in early December and the owner of the garage had his best mechanic drive the car a short distance to my home. So, a Happy Christmas was had by all.

I am sure that this long journey could fill a book with other earlier exploits from my driving days but I have just about saturated my poor literary skills in the writing of this journey. So, it only remains for me to mention a number of people who have made this journey possible in addition to those already mentioned.

John James – Totally T type 2

Pete, Martin, Mark – Octagon Car Club

Steve Hill – SH Restorations

Eric Worpe

Ron Ward

Terry King – Victoria Garage

Steve Baker

David – Pickerings

John Pritchard

And last but certainly not least my wife Ann who always encouraged me to complete this DBL 54 Journey.

Terry Midwood

List of Suppliers mentioned in the article.

Andrew Denton           www.mgashframes.co.uk

Andrew Turner            https://www.su-carbs.co.uk

Blockley Tyres            https://blockleytyre.com

Chris Wallis                 [email protected]

JJ Cables Limited       01926 651470

Mad Metrics                [email protected]

MG Octagon Car Club www.mgoctagoncarclub.com

NTG Motor Services Ltd         https://mgbits.com

Pickerings of Bradford     www.aspickering.co.uk

Raj Patel                      0116 244 8103

Steve Baker     https://www.stevebakermg.co.uk

SH Restorations          www.shrestorations.co.uk

GUSTO AND THE WALER

THE STORY OF MY TWO MG TCs AND AN INTERLOPING MG YA
by Michael Sherrell

MG TC/9491 aka UMG450 – now known as GUSTO.          

It is always a bit daunting to begin writing about 9491 because it is such a long and complex story. It started in 1957, when I began my education in historic racing and sports cars. The names of Nuvolari, Varzi, Fangio and Caracciola, famous drivers of these thrilling devices became ever more familiar. The images of Type 35, 57 Bugattis, Alfa Romeo 158s etc. became embedded in my mind.

I looked around to fill the void and that’s when I came across the MG TC. No racing car, although it could be raced, not a Type 35, but it seemed to have a lot of similarities. And so, the search began. For the next year or so, weekends were devoured searching the used car yards, Jack Ayers Performance Cars in Guildford Rd and James Harewood’s various sports car sites were frequently visited. Meanwhile my best mates Bob McQueen and Brian Pateman had bought TCs.

Panic set in, and so after what seemed years of juggling finances and searching used car yards, I found TC/9491, registration UEU161. I had just turned 19. I know I was desperate because I had bought the cheapest, nastiest TC in town. Bob and Brian already had their TCs, both very nice cars, one in Clipper Blue and one in White. And there I was until now, driving a Morris Minor Convertible … Ahem.

I found my car in Beaufort St Inglewood at Custom Car Sales, said to be the dodgiest outfit in town. The price was £350 when the cheapest TC around was £450. That tells you something. I had £50 to my name and a Morris Minor, which I had by that time repainted very badly, making it insufficient for a deposit. No problem for the ‘Dodgy Bros’. They merely added £100 to the TC price and added the same to my Mickey Minor, thus giving me sufficient deposit and Custom Credit rich. 

They say that love is blind, and that old saying applies just as well to proper cars. 9491 came with a tartan Laminex Dash with matching tartan plastic seat covers. The original Douglas Bluemels wheel had no centre plate, just the steering inner column poking through. The wood stringers had disappeared to dust, rusty bolts hanging in space between the running board mounts and the tub frame – picture that!

By 1959 it had already done 100,000 miles, repainted two or three times, reupholstered at least twice, raced in 2 Caversham 6 Hour Races. All this in just the first 10 years of its life. Meanwhile, it had obviously never seen a garage, but it was quick!

And so began The Trouble, and with it a steep learning curve in mechanical engineering. “I don’t think I can live through another diff” saidmy long- suffering mother. Wheels kept falling off ‘till I discovered the previous ‘custodian’ had put the front hubs on the wrong side then cross threaded the ‘right’ knock-on’s on. Problems, problems, but through it all I was learning a lot about my MG TC, and it was getting a lot better in the process.

Yer buyin trouble Son” Bob’s dad pronounced prophetically, when I proudly showed up with my TC. How right he was, but what he didn’t know was, he was looking at a lifetime obsession that would take the car and its owner on a journey of over half a million miles; survive an early Race rollover; be restored three times; have twice as many engine and diff. rebuilds; escape lethal breakages of stub axles and even a steering drop arm, all of which rendering car and driver bereft of any steering, and sometimes brakes, and still survive.

Less than two years into this doubtful collaboration of man and machine and through the TC-ownership/friendship of the above-mentioned mates, the TC Owners Club was born, flourishing still over 60 years later, and about which much has been written, a lot of it by me.

Along the way 9491 has had three colour changes: Dark Red; Kelp Beige, Black, and its Interior: Tartan; Red (leather discovered under the tartan); Arroyo; Green. Around 1965/66 the UMG registrations appeared and UEU161 was run over, defaced and re-presented for replacement. The result was UMG450 – white lettering on black – later to become black lettering on reflective white. As an aside: the TC has always been fully road licensed, which in today’s money amounts to something like $43,000, just in Registration.

Gusto – UMG450 – TC/9491 – is pictured in a Motokhana, so it’s still being well used, as well as a daily driver.

In December 1989 I was rescued after 33 years as a vassal, from what is now Telstra, by a ‘Golden Handshake’. My alumni of 1957 had been technically trained over five years in a painstaking manner involving first principles. We were taught to do it thoroughly and well. But now we had become a nuisance, costing time and money. We were called ‘gold platers’. We had to go. In life, timing is everything. I had written my Magnum Opus: ‘TCs Forever!’ over the learning years of breaking and fixing and restoring, but with no way to publish it; and now I had been handed a pile of cash to do just that, and I did, thanks to my lovely, supporting wife Loretta (now dec.), who said “If you don’t do it, you’ll regret it for the rest of your life”. The book was launched at the State Library, thanks to the influence of that old scallywag Noel Semmens, in January 1991, and went ballistic shortly after. In the many years following, I learnt some more about using and fixing these fascinating art forms, and so thought I had more to contribute to my first work. In May 2017, I launched ‘TCs Forever-More!’ – about using more, and extending more, the joys of our classic Original TC.

Then on 27th November 2019, this collaboration of me and the ‘Gee’ had reached a milestone of 60 years. 60 years of pleasure and pain; of joy and heartbreak, of sun and rain, of exhilaration and cursing. When I step into ‘Gusto’ I’m 19 again until the end of the drive. Getting out is harder now, but I can do it with a good haul on the windscreen pillar. Twenty two restorations have come and gone. It’s getting harder to get up and down off the floor, but the passion still burns bright. I am, and always have been its devoted servant, and will be until that long road winds into the sky.

MG TC/9349 – My Café Racer – aka UMG049
First named ‘Grunt’ –  but  now, ‘The Waler’.  (Look it up).

A bare chassis was sent to me from Abingdon Motors in QLD, way back in the mists of time. It turned out to be a TA (which I should have kept but passed it on to Al Herring. So, after a short delay a TC chassis arrived from the same place, sent as agricultural machinery for $300).

Over the course of many TC restorations, I had accumulated a number of TC bits, but some vital ones were missing. I bought a gearbox from South Aus., a spare XPAG (XPAW) engine I had brought back from Albany in the ‘70s. Body bits were varied – I had inner guards made at the Perth Airport and the bulkhead came from the Melville Tip! – a windscreen and fuel tank from Victoria, etc. The body was built with the assistance of son Dan, from a Tassie Oak wood kit again from S.A. Apart from the bulkhead from the Tip, I had most of the panels but they sure needed work.

Eventually it all went together and built up on the now rolling chassis. In a flight of fancy, I mocked up a FIAT Twin Cam engine and its 5-speed gearbox and fitted it to the chassis. It was going to work, but as a reasonably prominent TC tragic, peer pressure was real. So, it was back to the tried and true: supercharging. With the bodywork completed it was painted in Silver with Dublino Green scuttle top, bonnets and wings.

As my long used road TC/9491 (600,000+ miles), had so many years of active use on road and track, it was time for this new Club Racer, ‘The Waler’, once ‘Grunt’, to take over the circuit work and let ‘Gusto’, TC/9491 newly named, return to its Original Nature, albeit with some sneaky undetectable mods.

In the meantime, Grunt’s completed, painted body, was stood up on its back in the corner of my tight workshop while other TC restorations continued. Years later, body and chassis came together, and run to begin with on carbies, to sort things out. Next, an Eldred Norman supercharger, made under licence by Wray in S.A. was with some ingenuity, difficulty and assistance, fitted. So began my education with the mystical, myth-ridden journey – down the Rabbit Hole – of supercharging. Meanwhile, some minor mods. were applied to the chassis: ‘boxing’ to the front over the axle arches; anti-roll bar also to the front, as well as forward roll front axle restraints as per Pre-War MG practice. The front was also lowered with what amounted to 20mm blocks. Well-drilled cast iron brake drums were fitted to standard brake assemblies, except for some skulduggery applied to the hydraulics. The rear was left to look after itself, apart from the fitting of an MGB diff. with 4.3 MGA ratio, the original soon being destroyed by Eldred’s blower up front. 16” cross lace wire wheels and fat tyres completed the build, while the body lost its bonnet sides and windscreen, gaining 2 Aero’s, but carried full seats, carpet and trim – not light, but comfortable and versatile when driving to and from the circuits.

The Eldred Norman vane blower proved very effective at the one and only Ellenbrook Sprint (2001). Around the streets yet to be housed, the TC with a time of 56.4sec humbled some very potent Moderns e.g., two BMW M3Rs; a one year old 5.7L Commodore HSV GTS; a 1998 Lotus Elise; three Westfields etc. It was in fact quicker than another 57 serious cars.

TC versus Tiger

The days of this wonderful vane blower (with who knows what boost) were numbered however, when in the middle of a Club motorkhana at peak revs, it swallowed a vane with disastrous consequences, fortunately only to the blower itself – and to the driver’s clothing – a ¾ twist in the drive shaft and some alteration to the interior. This was all miraculously repaired by John Bowles and the entire set-up sent off to Canada with somewhat reduced boost, but still very strong. Suffering withdrawal, a replacement was soon sourced in the form of an SC14 Toyota Rootes type blower, which, while the boost was reasonably modest, trouble lay ahead.

I must have jagged it the first time but now I had some serious detonation problems, twice blowing the ring lands off my cast iron pistons (with no other internal damage, but engine out, engine in, engine out, etc.). The cure came in the form of some beautiful forged alloy pistons from Special Piston Services, a new blower friendly Dizzy from Performance Ignition Services – ‘Scorcher’, a Chinese copy of a Bosch with a reduced advance tailored for an XPAG engine, and some serious attention to tuning involving a 2” HD8 SU, and a range of UV Series needles. (0.120” jet). Otherwise, it had a modest 8:1 CR and a std. camshaft, std. exhaust manifold and boost round 9lbs. I had learned the hard, but permanent way.

Drawing on our beloved Factory’s Record Breaking experience, some surprising mods. were introduced into the engine’s cooling: the block’s (round hole) water passages and the corresponding head passages were blocked off by drilling and tapping the holes to receive threaded cast iron plugs, thus sealing off the two, except for the large entry at the rear of the head face. The top rear core plug in the block was removed and received a 1” pipe, which then entered the rear of the head through its existing plate. It had the effect of drawing normally sluggish block water up to the back of the head to join the normal pump-to-head flow. The result was remarkable: the TC then needed a radiator blind in cold weather, and on the track could take a beating even in hot weather, without going over 800 C.

This simple car made from bits, has given me so much pleasure over the last 25 years, is usually driven to and from the Circuits and apart from a few dramas, has been the soul of reliability. Long Live ‘The Waler’!

MG YA/3184 – my Q ship – aka UMG490, always known as ‘TINTIN’

This over ambitious project began many years ago when I acquired a derelict YA saloon sans engine and gearbox (previously robbed by a ‘MG TF-er’). It should have gone straight to the tip and in some ways, I wish it had! But no, I had this vision of a very rapid Y Type. We used to call such a car a ‘Q Ship’.

I had some examples to go by: a Y Saloon came over for an MG National Meeting many moons ago. It had an MGA style 1600 motor and gearbox and while casually engineered, it got along quite well thank you. Meanwhile another MG Y, a Tourer this time was being built up locally with an MGB motor and gearbox.

This was enough for me to ignore the obvious difficulties ahead and get on with it. However, as with the TC Café Racer before it, it had to come together in between TC restorations going on in full swing, resulting in a gestation of 8 years and 1 month. First, the body was removed from the chassis and sent to a caustic bath. When I retrieved it, it looked like a shiny colander! So many holes! ‘Tin worm’ had savaged it and looking at it again, I should have walked away. But no, my stubborn nature took over and the process continued. So much of the body was non-existent I could see it was going to be a task beyond my skill set, so it went on a garden trailer for a trip down to Clive Ross and the Hammerworks, nearly slipping off just before arrival.

Over a period of months Clive worked his magic, replacing the bum end of the car entirely, making up and fitting new complete sills, then freeing up the sunroof, which had been welded shut and filled with asbestos rope. A lot of pushing and pulling with a Porta-Power followed to make the 4 doors fit the tub, and the windscreen to fit the hole. Eventually the heavy work was complete, so I took the tub home to prime it before it began to oxidise and see it deteriorate to where I started. Meanwhile Clive made new running boards and panelled the 4 wings.

At home work began on the running gear. An MGB overdrive gearbox and banjo diff arrived on an open pallet from the UK, and an engine was acquired from a local MGB donor, which was itself having its own Rover V8 transplant. When I pulled the engine apart, I found the internal oil pump attached by one loose bolt, so the lucky owner had just avoided a monumental detonation. The ‘new’ bits were pulled apart for inspection, clean-up, replacement of gaskets, oil pump bolts etc. The bearings were std and looked fine, so they went back in; an MGB ‘O’ head was acquired (bigger valves) and after a steep learning curve, the overdrive part of the gearbox was made to work.

Meanwhile at the rear of the chassis, the YA Panhard rod was retained, and with a bit of fudging and stretching, the B diff banjo was made to fit the YA rear springs. Yea! Previous fudgers had come up with a ‘Penguin’ bracket to replace the Y’s toy rear shocks, with of all things, Mini Front ‘Tellies’ to complete the rear arrangement. At the front, due to the British Motor Industry’s reluctance to change things for their own sake, the Y front end was identical to the B, (or we should say, the B’s front end is identical to the Y), except for the top wishbone and shocker. Fitting the B version was merely a matter of slightly enlarging the mounting holes on the shocker base.

Later, after the engine was fitted, I needed to replace the Y front coils with MGB ones, as the front sat up too high. The engine/gearbox fitting was again assisted by those who had gone before, requiring many vertical and horizontal measurements, and a bit of judicious angling in various planes. The centre engine mount retained as before and the engine steady moved to a more accessible rear position. The result left two major problems: one, the front SU went close to the near-side bonnet, and the other, more serious, the steering column intersected the distributor. There have been several strategies to overcome this problem: my version was to use a TC DKY4 dizzy with 8mm removed from its mounting face and re-jig the advance curve to suit. A ‘flat cap’ lid, allowed the leads to exit sideways. The gearbox cross member had to be lowered by a full diameter, the std. B gearbox mounting itself retained. A new shortened tailshaft more or less completed the drive train, while now having virtual MGB front and rear ends, the result was MGB brakes, disc front and drum rear, and wire wheels. Larger diameter (15”) MGA wires were used in place of the MGB 14’s for a higher gearing.

The Y had now become what was virtually an MGB GT with a YA body, complete with original seats and trim in minute detail, thanks to the brilliant work of Geoff Thompson. Weighing only 40kg more than a BGT, it really is a Q Ship, and gave the many curious a fright on the Freeway. The one thing I hadn’t counted on was the wind noise. At 80mph plus I could hardly hear my CD player hidden in the glove box, behind an immaculate burr walnut, book matched dash.

Michael Sherrell

Calibrating magnetic Smith speedometer

Now that your speedometer is cleaned with the aid of the previous articles, you may have realized that a calibration is needed.

This article will help you through this procedure. The tachometer is also based on the same principles and the same mechanical assembly. It could be adjusted the same way.

When I refer to RPM in this article this should be understood as input shaft spinning speed of the speedometer.

Remember this important diagram from the first article.

Theoretical speedometer curve

The offset parameter B should normally be nil since the needle should indicate 0 for a speed of 0 RPM.

As the instrument is mechanical, there are static forces that disturb the indication towards 0 RPM. So, the ideal function represented as a straight line in the diagram is actually distorted around the low speeds. We can adjust B so as to minimize the gap between the true function and the ideal straight line.

You may read many tricks for calibration just with tuning parameter B. Adjusting B is easily performed by rotating the needle on its axis so it rests in another position. It can be sufficient but adjusting the gain parameter (A) is rarely addressed.

On the dial of the TD instrument, we can read a small number print: “1600”. This magic figure is actually the A parameter. It means that when the input shaft rotates 1600 times, the odometer will show 1 mile. And if the input shaft is spun at 1600 turns per hour, the speedometer should read 1mph. Turns/hour is not a practical concept. Turns/minute is better to handle: RPM.

Hence the following formula:

The formula shows that increasing the RPM by a certain amount, the speed indication will also increase by a constant amount. And this is true even if B parameter is not zero. This is why A is the first parameter to adjust. As an example, for this calibration procedure, increasing the RPM by 800 RPM should show an increase of 30 mph on the dial.

Because of the non-linearity towards 0, it is preferred to calibrate the gain parameter at higher speed. I choose to calibrate at around 50 mph which is a speed when we need true indication from the instrument. The corresponding spinning speed of the input shaft is approximately 1300 RPM. Exact value is not important for the gain adjustment.

The set-up

You will need a drive motor with steady speed. Use a drill press, a lathe or make your own bench with a DC motor. It is important to have a faithful indication of the bench rotating speed. I use an optical tachometer that can be purchased on eBay for 20 euros. If you use a drill or a lathe, it should be set to reverse as shown in next picture.

Driving direction

The calibration bench

Sorry for the pictures that do not show a TD clock but another similar Smith instrument. I don’t want to disturb my calibration that was made previously. Connect the speedometer with a spare cable. Motorbike cables are shorter and thus easier to handle on the bench. Have a small magnet ready for adjustment. Rare earth small magnets (1 x 0.5 x 0.5 cm) can be purchased for a few euros.

The measurement procedure

1) Set the bench speed to 1300 RPM on the reference tachometer. Note the indication of the TD instrument.

Now set the bench speed to 1300+800 = 2100 RPM on the reference counter. The TD speedometer should read exactly 30 mph higher than the first measurement.

2) If this difference is greater, then you should decrease the magnet strength. If it is lower than 30 mph then you should increase the magnet strength. If it is equal, you can jump to B parameter adjustment.

Decreasing the magnet strength

Drive the input shaft at a speed between 500 and 800 RPM. No matter the exact speed. Watch the needle. Very slowly bring a small magnet close to the rotating plate. When the magnet is a few millimetres from the rotating plate you should see the indication of the needle decreasing. Get a bit closer if it does not decrease. But still very slowly and always watching the needle for slight decrease. Now perform the measurement procedure and loop to decreasing or increasing step if necessary.

Decreasing the magnet strength

Increasing the magnet strength

Stop the drive bench and slowly bring the magnet near the plate. Let the magnet land freely on the plate so that it is oriented along the existing field of the magnetic plate. Then slide it outward and take it away from the plate. Now do the measurement procedure and proceed to decreasing or increasing step if necessary.

If you cannot increase enough the strength then try a pair or a more powerful magnet.

Decreasing is proportional to the distance between the magnet and the rotating plate. Easy to dose.  Increasing is strong and may bring the indication too high at once. So accurate adjustment is generally obtained during weakening procedure.

Increasing the magnet strength.

B parameter adjustment

When you are satisfied with the A parameter check the absolute values indicated by the needle against the first graph. It may be necessary to adjust the offset parameter B. Adjusting B is simply made by shifting the needle on its axis. Drive the input shaft to the theoretical speed you want to set as a reference for the instrument. 45 mph is roughly at the middle of the scale and can be selected as a reference. Moreover, it corresponds to a round value of RPM: 1200. So, drive the shaft at 1200 RPM and note the indication of the needle if not correct.

Now stop the driving motor and rotate the aluminium plate with your fingers so that the needle indicates the previous noted speed. Extract the needle with the fork tool described in the first article and position the needle so that it shows 45 mph.

Still on the bench, you can then draw the actual curve of your speedometer from 0 to 2400 RPM and check it against the theoretical one.

When you are satisfied, fit the instrument on the dashboard and enjoy a drive in your car. I guess you will check the instrument against the GPS measurements. Both may disagree because of the diameter of the tyres, wear out or pressure. But now the instrument is calibrated as it was when new. This means that speedometer and odometer indications are consistent.

It is still possible to adjust A and B slightly differently to match the GPS but you should know that the odometer cannot be adjusted. It remains on the 1600 TPM ratio which is determined by the gears. That’s why this procedure cannot be used for a rear axle ratio upgrade.

I hope that you enjoy this series of articles. Delicate jewellery job in between greasy mechanical operations!

Laurent Castel

The Tribute Tour by Adrian Martin (Part 2)

The Terre di Canossa Rally

Background

The Italians are, of course, well known as being very enthusiastic about anything on wheels, especially if they live in the area of Emilia-Romagna, which is known as Terre dei Motori or Motor Valley, which includes Modena, Maranello and Imola. 

The local car clubs organise many Regularity rallies which are not speed events but an opportunity to drive the wonderful roads in the area at a sensible pace.  We decided that we would have a go at the Regularity competition but it is quite possible to give the regularity part a miss and just follow the road book.

Friday morning

After a very sociable welcome dinner of some 250 people at the 10th Century Castello di Tabiano, we are starting off the next morning in heavy showers:  Not quite what we had expected! 

There are a total of 98 cars on the entry list with the majority being post-war through to 1973. The oldest is a 1925 Lancia Lambda. Apart from the three MG T-Types there is an MGA.  Other British cars include TR2s, Jaguar XKs, E-types, and Austin Healeys.

Left: The two TBs, a 1937 Lagonda and a 1923 Bentley Le Mans starting ahead of us. Right: We are off. The Police follow us along the whole route to ensure that we are not held up!

The cars leave at 30 second intervals and we have 93 km and nine pages of the Road Book to follow before our coffee stop.  The route takes us straight into the mountain area and up to the Santa Donna pass at 935 metres above sea level.  Even in the showers, the landscapes are wonderful as we climb further along the SS 21 to the Centro Croce pass at 1055 metres.

There is an organised stop for an Espresso and an “Amor” dolce pasticcini at Borgo Val di Taro and the weather doesn’t dampen the enthusiasm of the locals.  As we head down into Liguria on the SS 523 there are a fair number of hairpins and some breathtaking views.

Left: The three T-Types on the way to Bardi. Centre and Right: Coffee stop at Borgo, which is famous for its mushrooms.

After the little harbour of Le Grazie we reach Portovenere, our destination for lunch.  The town has been cleared of all traffic so that we can all park in the centre of this idyllic port which is at the end of the Cinque Terre.

Lunch stop at Porto Venere on the Ligurian coast.

Saturday start from Barga

In the mountains

Driving through Lucca in Tuscany

A traditional welcome on the city walls of Lucca

Castelnuovo di Garfagnana

Sunday Start from Barga to Forte Dei Marmi

Sunday storm caused the route to be shortened via the Autostrada

The finish on Sunday

Tribute to the winners – my wife and the TC!

Editor’s note:   Adrian’s trouble free 2,500 mile run into Italy and back is testament to the ruggedness of the TC.

As will be noted from one of the pictures, there was quite a lot of rain around over the Apennines and this is where the Continental 155 70 19R 84Q radials came into their own.

Adrian has been experimenting with tyre pressures. The recommended pressures for these tyres on the heavy electric BMW i3 is 33 to 36 psi on the front and 41 to 44 psi on the rear, depending on load. Adrian feels that these pressures are too high and has tried 28 psi all round at the lowest and 35 psi at the highest.