
This article may not appeal to the MG T-Type purist due to the non standard modification I am about to describe, but hopefully it will be of interest to most T-Typers. It is not a detailed technical article but a log of my experiences and thoughts with what I hope are a few helpful suggestions and some worthwhile contacts at the end.
I’d like one of those one day…..!
10 years ago when I set out to buy a T-Type MG the very first car I looked at was a supercharged TC. It was well outside my budget but it triggered a wish to run a supercharged MG at some point in the future. However, as usual when buying a new car, there are all sorts of things that crop up to divert any available funds and it took about another 8 years before I was in a position to start thinking about it again. Even then, looking around, it became clear that finding a supercharger was not going to be easy and made doubly difficult as the project was to be completed on a fairly limited budget. Over the space of the next 18 months I managed to find three for sale in the small ads and two of those were well outside my budget. Not only that, they had been sold by the time I managed to respond to the advert. So rather than relying on the small ads, I started emailing around and talking to other MG owners, as well as some of the T-Type racers.
Careful research bears fruit…..
Eventually I came across Steve Baker’s web site and dropped him an email asking if he had one for sale. To my surprise he did, although it was not the period unit I had set out to get, but a modern Eaton supercharger adapted to fit a XPAG manifold. This unit was a nearly new unit that had been used on his own car, however in a subsequent chat he offered a brand new unit which came with an inlet manifold specifically designed to fit an XPAG engine. It was a new design which had not been fitted to a car in the UK before. A deal was haggled and a date set for nearly four months ahead when I could collect it. This allowed me some time to check the engine over and carry out one or two maintenance items that needed attending to on the car.
Steve was extremely helpful and he guided me on what I should be looking at on the engine to ensure it could cope with the extra power. I was fortunate in that the engine had been professionally rebuilt a few years before I acquired the car and had not covered too much mileage since. A test of the cylinder compression showed that all were within a couple of pounds pressure of each other, which was the major worry. Had there been considerable variation it would have necessitated an overhaul of the engine which was beyond both the time and cash I had for this project. One job that did need doing was to replace the core plugs as three of these had been weeping for a couple of years and they were getting worse. This was a task that I had been putting off as the one in the worst condition was located at the rear of the engine block next to the firewall. The others that needed attention were directly below the exhaust manifold, so almost as difficult to access.
Two steps forward, but one back (later)…..
Like many T-Typers I try and attempt as many tasks on the car myself but, as I am not very mechanically minded, I am not shy about calling for help when my knowledge runs out. Having talked to quite a few people and looked at all the advice in the various journals on replacing the rear core plug, I decided I didn’t want to cut a hole in the fire wall, so the only other solution to make sure the work was done well, was to lift the engine out of the car. A friend with an engine crane kindly offered to help and one sunny late January day with air temperatures hovering around zero we pulled the car on to the driveway and set to the task. I had done as much of the preparatory work myself as I could beforehand, so all we had to focus on was lifting the engine and gearbox out. All went surprisingly smoothly except for one tiny snag. Neither of us remembered to take off the aluminium cover and gear lever from the gear box and it snagged on the firewall as we attempted to lift the block. There was no apparent damage, or so we thought at the time, and once the cover was removed the engine came out cleanly.
Doing the job properly…..
Over the next few weeks the engine was degreased, cleaned of paint, all of the old core plugs removed, the cooling system flushed through before new ones were installed. These were coated with 2 heavy coats of Hammerite paint before being installed. Various gaskets were replaced prior to repainting the engine and gear box in the proper MG engine maroon colour. I also took the opportunity to clean and touch up the engine bay and many of the other peripheral items at the same time.
It was planned that the supercharger would be fed air/fuel via a single 1¾ inch SU carburettor and one of Steve’s recommendations was to improve the delivery of fuel to the supercharger by adding a Facet pump to replace the low pressure unit used on the TD. As I wanted to keep the look of the car as original as possible (the Eaton SC looks very similar to the period Shorrocks unit) I decided to fit a second Lucas pump in tandem with the original to provide the period look of a TDC. Pumps are plentiful but the mounting brackets are not and no one had them in stock or had any idea when they might be available, so in the end I had to have one made.
The really useful Ad Hoc Engineering
A small local engineering firm called Ad Hoc Engineering fabricated one out of stainless steel for me after I provided a drawn design to match as closely as possible the original fitting. Rubber mounts for the bracket, copper fuel line and the fuel tank to pipe connector piece were purchased from Moss. The last item which fits in the fuel tank drain plug was slightly over sized and needed to be machined down, again done by Ad Hoc Engineering. Fitting these items went very smoothly. A hot air paint stripper was used to anneal the copper pipe to ensure it bent easily without fracturing and a honey jar provided a former to obtain nice smooth curves in the pipe. The second line was attached to the chassis rail adjacent to the standard one, using the correct clips. Pleasingly this part of the project went without a hitch.
Remember two steps forward but one back?
One March afternoon my friend came round again we put the engine and gear box back in the car. As he had done this a number of times before he suggested we make sure everything moved freely, by engaging a gear and moving the car back and forth, before putting all the peripherals back on the car. This must have been foresight because however hard we tried we could not engage 1st or 2nd gear. With day light hours still short we still managed to remove both engine and gearbox quite quickly before it got dark. Lifting the lid on the top of the box it quickly became evident that one of the selector rods had been bent when the gear lever snagged on the fire wall.
Mark Sellick to the rescue…..
Obviously this generated another job before the car could run again. Brian Rainbow recommended Mark Sellick as a good person to speak to about gearbox repairs. Luck was with me and he managed to turn around the repair in less than a week and at a reasonable price using a mixture of new and second hand components. It was a good thing I passed this task across because Mark encountered a couple of seized bolts on the top of the selector rods that sheared as he tried to get them out requiring some additional repairs.
Putting the engine back in the car for the second time in the space of a couple of weeks we knew what to expect and this time the unit went in fairly easily. To our joy (and surprise) the car fired up on the first pull of the starter. After all the other components were put back on the car it was run for about 400 miles as I wanted to be sure all was okay before I attempted anything else. All went smoothly so it was onto the next stage of the project.
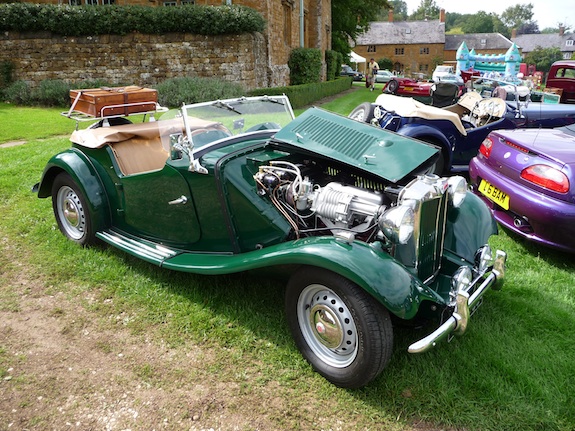
Following further discussions with Steve he felt that it would be best if we fitted the supercharger together at his work shop, as this would give me confidence on the whole installation process and allow him to see how the new inlet manifold fitted and worked. The 50 mile run up to his house was pleasant in the July sunshine and we decided to do the work on his drive way rather than being inside. Having recently taken the car apart to remove the engine, all the items that needed to be removed to fit the unit came off easily. This included the bonnet, carbs, manifold, horn, radiator, fan and starter switch.
A relatively trouble free fitting session…..
The supercharger came as a kit complete with instructions. It included the blower unit, inlet manifold, double pulley wheel to take the drive belt plus the existing fan belt, clamp bracket for the supercharger’s long nose and a few other peripheral parts like the long V shaped drive belt. The kit was manufactured in the USA and made of duralinium and stainless steel and produced to a very high quality with a superb finish. On the advice of the suppliers of the kit, a 1½ inch SU carburettor was fitted because, as the engine is un-tuned, the fuel demand is not great enough to justify the 1¾ inch carb Steve and I had planned to fit. During the installation a number of small problems were encountered but nothing that couldn’t be overcome fairly easily. Working together at a fairly leisurely pace it took us nearly 8 hours from start to finish to fit the supercharger and get the car running again so I could drive it home.
The TD was booked into Peter Burgess’ workshop in Alfreton, Derbyshire, the following day, to be set up on his rolling road. Steve recommended that I didn’t exceed 3000 rpm until the car had been correctly tuned. So it was quite a frustrating slow drive home that evening and the trip up to Derbyshire the next morning to Peter’s workshop was even worse, having to negotiate the heavy rush hour traffic.
A rolling road experience and 6,500 rpm….!
Until this point I had no idea what to expect when the car was put on the rolling road, having never experienced this before. On Peter’s instructions I drove the car on to the rolling road so the back wheels dropped on to the pair of rollers. He then strapped the back axle down to U bolts set in the workshop floor. The bonnet was removed to give easy access to the engine and he placed a very large electric fan right in front of the radiator to assist with cooling. An electronic metering system was then connected to the engine and a CO2 monitor to the exhaust, so between them the computer could analyse the benefits of any fine tuning Peter would be carrying out. The next bit was seriously scary for me, as he ran the engine up to 6,500rpm, i.e. right off the scale on the rev counter. His comment was that he needed to prove that the engine wouldn’t break half way through the testing. The noise of the car in the confined space of the workshop was unbelievable and was only just louder than my thudding heart!
Over the next couple of hours Peter ran the car like that 12 times, each time up to about 6,000rpm. In between each run he adjusted the carburettor, plugs and timing in order to get the best performance from the engine. With each tweak the performance improved and towards the last test I filmed the dashboard as he revved the car up, to show 6,000 rpm on the rev counter and 100mph on the speedo. If you want to see the film it is on You Tube. Type in “MG TD supercharged”. Please bear in mind that my speedo is probably not too accurate and as there is no wind resistance to encounter in the workshop the car will never achieve this speed on the road.
Afterwards the car was a completely different machine, running ever so sweetly and with noticeably better acceleration and torque. The computer readouts showed that the bhp had increased to 76 at the flywheel, which is excellent as the engine is completely stock and only had 54 bhp when new.
The drive home was completed with a huge smile on my face and a rather heavy right foot!
There were still a few tasks that needed to be completed before the project was finished to my satisfaction. The main one was to source and fit an air filter. I wanted the best I could find and KN was what everyone recommended. After a lot of careful measuring I managed to determine that the narrowest centre mounted version of the pancake type filter would fit but it would require the repositioning of the starter switch further back up the fire wall to create sufficient space and even then it would be a tight fit. It was a fiddly job but it worked and looks good.
So what have been the downsides of supercharging the car?
In fact there have been very few, the main ones being:
• The positioning of the supercharger in the engine bay means that at the moment the car only has one horn. I have yet to find a suitable place to position the second one. It is a small inconvenience to have just one and is more of an aesthetic issue than a practical one.
• To fit the second fuel pump and relocate the starter switch I had to drill four holes in the firewall, two for each unit. These were the only modifications I had to make to the body work. Everything else done to the car is reversible.
• The fuel consumption has increased slightly. More on that later.
So what are the upsides and what is the car like to drive?
Since installing the supercharger last summer I managed to put about 800 miles on the car and these are some of my experiences:
• Power: Wow, the car is transformed! The acceleration is better (the car still has the standard back axle ratios) and the car manages to keep up with the modern traffic more easily. But it is the torque that is really noticeable. Hills that used to require 3rd gear are accelerated up with no trouble in 4th, even with a passenger and full luggage rack as we found out when Alison and I went down to the Goodwood Revival last September for a few days away.
• Engine temperature: this hardly ever rises above 85 degrees even when being driven hard on warm days and is usually steady around 82.
• Starting: The car requires only minimal choke except on cold days when full choke is necessary and then only on the start. If it is left out for more than a few seconds the engine floods and falters.
• Fuel consumption: Unfortunately this has dropped to around 23 to 25 mpg (previously 28 to 30) but I think this is as much about a lack of control over my right foot as I enjoy exploiting the extra power. Now that the novelty is starting to wear off I am beginning to drive more normally again so I expect the mpg figure to improve.
• Noise: Virtually none extra from the engine bay but the exhaust note sounds slightly louder than before.
• Braking: A number of people have asked me what I was planning to do to improve the braking now that the car has the extra power? Interestingly, with the brakes well set up on the TD I have not found the need to make any alterations. Again, from talking to some who use their T-Types for racing and sprinting, many rely on the twin leading shoe of the TD/TF as being the best brakes T-Types ever had. Certainly they cope well with what I ask of the car.
• Maintenance: None, as the supercharger is engineered to a very high standard and being a sealed unit requires no additional oil supply or regular maintenance work.
• Look: I set out to try and get the period look as far as possible and by and large I think that is what I have managed to achieve, although others may disagree.
• Reversibility: I am aware that the changes I have made to the TD are my choice and for my pleasure. The next owner of the car may prefer to return the car to standard format and the work done is all reversible except the four extra holes in the firewall which could be plugged with grommets or filled if necessary.
• Reassurance: Having someone else demonstrate that the engine can rev to 6,000 rpm and a little beyond, without breaking, is actually very reassuring and shows the durability of the XPAG. Whilst I don’t run the car to those levels it is comforting to know that the engine is easily capable of running beyond the occasional burst to 5,000rpm that I sometimes take it to.
So what were the learning experiences I can share?
• When taking so much of the car apart, make sure you have made room to store all the components, they take up considerably more space than you might imagine.
• Before starting the work to remove the engine, using the workshop manual make a tick box list of every item that needs to be done, and in the correct order. The same list can be used in reverse for the refitting. This is far easier than having to constantly refer to the book to discover “what next” and saves the manual getting covered in grub.
• Invest in a few packets of sealable sandwich bags and yellow sticky labels, so that everything removed from the car, including nuts and bolts that may be removed from a fitting, are bagged and labelled for easy identification when it comes to replacement.
• Get in a load of boxes to store all the bagged bits you remove. Label and use them logically to make easier the refitting of the components removed.
• Allow at least twice as much time as you think you might need and then add more. Nearly everything takes longer than expected. (Maybe I am too optimistic!)
• When taking the car apart one job inevitably leads to finding another one you had not planned for or costed, so make sure you have some contingency in both the cash budget and timetable for the unforeseen.
• When replacing the cork gasket located under the square steel cover on the waterway at the back of the engine block, do not re-use the 4 cheese head screws but replace them with hex head bolts. With the engine back in place the screws are virtually impossible to access if the gasket hasn’t sealed correctly and weeps. Using bolts allows easy removal of this cover at any time, even with the engine in the car.
• It takes a minimum of two cans of aerosol paint to coat the engine and gear box, preferably three, to get a really good finish.
• When removing the twin carburettors, make a timber former to receive them. Using a short length of wood (c.35cm long x 10cm wide), drill 4 holes located to mirror where the carburettor mounting bolts hold them to the inlet manifold. The holes can receive the actual bolts (alternatively, add four protruding dowels to take the place of the bolts to hold the carbs) and use this set up to hold the entire unit securely. This means you can store the carburettors safely without them suffering any alteration to their set up, allowing you to put them back on the car without the need for any fine tuning.
• Take the time to have the car properly set up on a rolling road as it does make a big difference to performance and smooth running of the car.
What next? Back axle ratio change, electronic ignition, five speed gearbox? Perhaps the last item some years down the line when we want to take part in long distance continental touring but until then no changes are planned, as the car is just as I want it. Which begs the $64,000 question “was it all worth it and would you do it again? Absolutely, I love the car set up this way.
I can’t finish this note without saying thanks to those people who helped out this project. Andy Bye for his assistance in removing and replacing the engine and the loan of his engine hoist, Mark Sellick for doing such a good job on the gear box and most of all, Steve Baker for his patience with my endless questions and worries, all of which he was able to answer. Lastly, Alison, my good lady for keeping Andy and I supplied with endless cups of tea, homemade cake and a patient ear when things weren’t going too smoothly.
Colin Hooper, June 2011
Useful contact details:
Steve Baker: www.stevebakermg.co.uk 01865 600251 Mark Sellick: email: louise_and_mark ‘at’ talktalk.net 07733 536966 Ad Hoc Engineering (John Watts): email: john ‘at’ adhoc-engineering.co.uk 01789 731119 Peter Burgess Engineering: www.peter-burgess.com 01773 520021
Ed’s Note: The following table gives the comparative performance figures for unsupercharged and supercharged (Shorrocks blown) TD and is taken from a 1950s article by W. J. Blower.


I am ging to do my TD